Your first page
One finished page: two panels, a drawing, a balloon with text.
1. Open page 1
In the page list, double-click page 1. The editor opens.
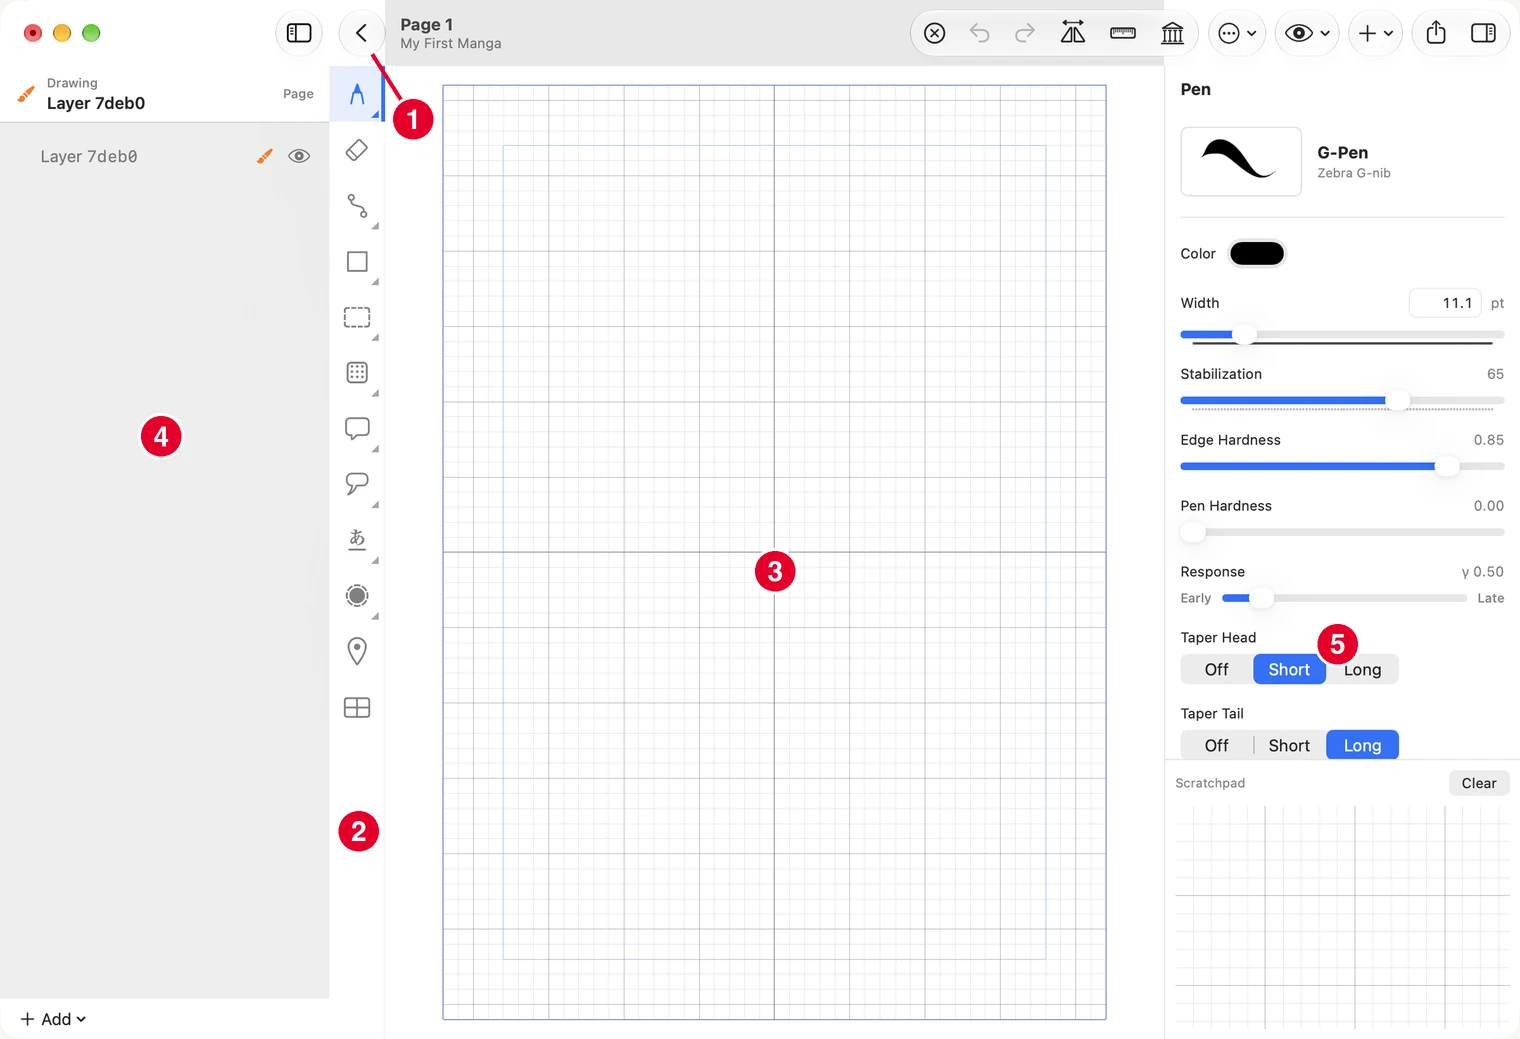
- Back — returns to the page list.
- Tools — the strip of tools. A small corner mark on a tool means it comes in more than one kind: right-click it to choose (on iPad, touch and hold).
- The page — where you draw.
- Layers — everything on the page, in a list. Panels appear here as frames.
- Settings — the options of the tool you hold, or of the thing you selected.
Three things you will want from the first minute:
- Undo — ⌘Z. Redo is ⌘⇧Z.
- Zoom and move the page — on a trackpad, pinch to zoom and scroll with two fingers to move. With a mouse, ⌘0 shows the whole page again.
- Back to the page list — the arrow at the top left.
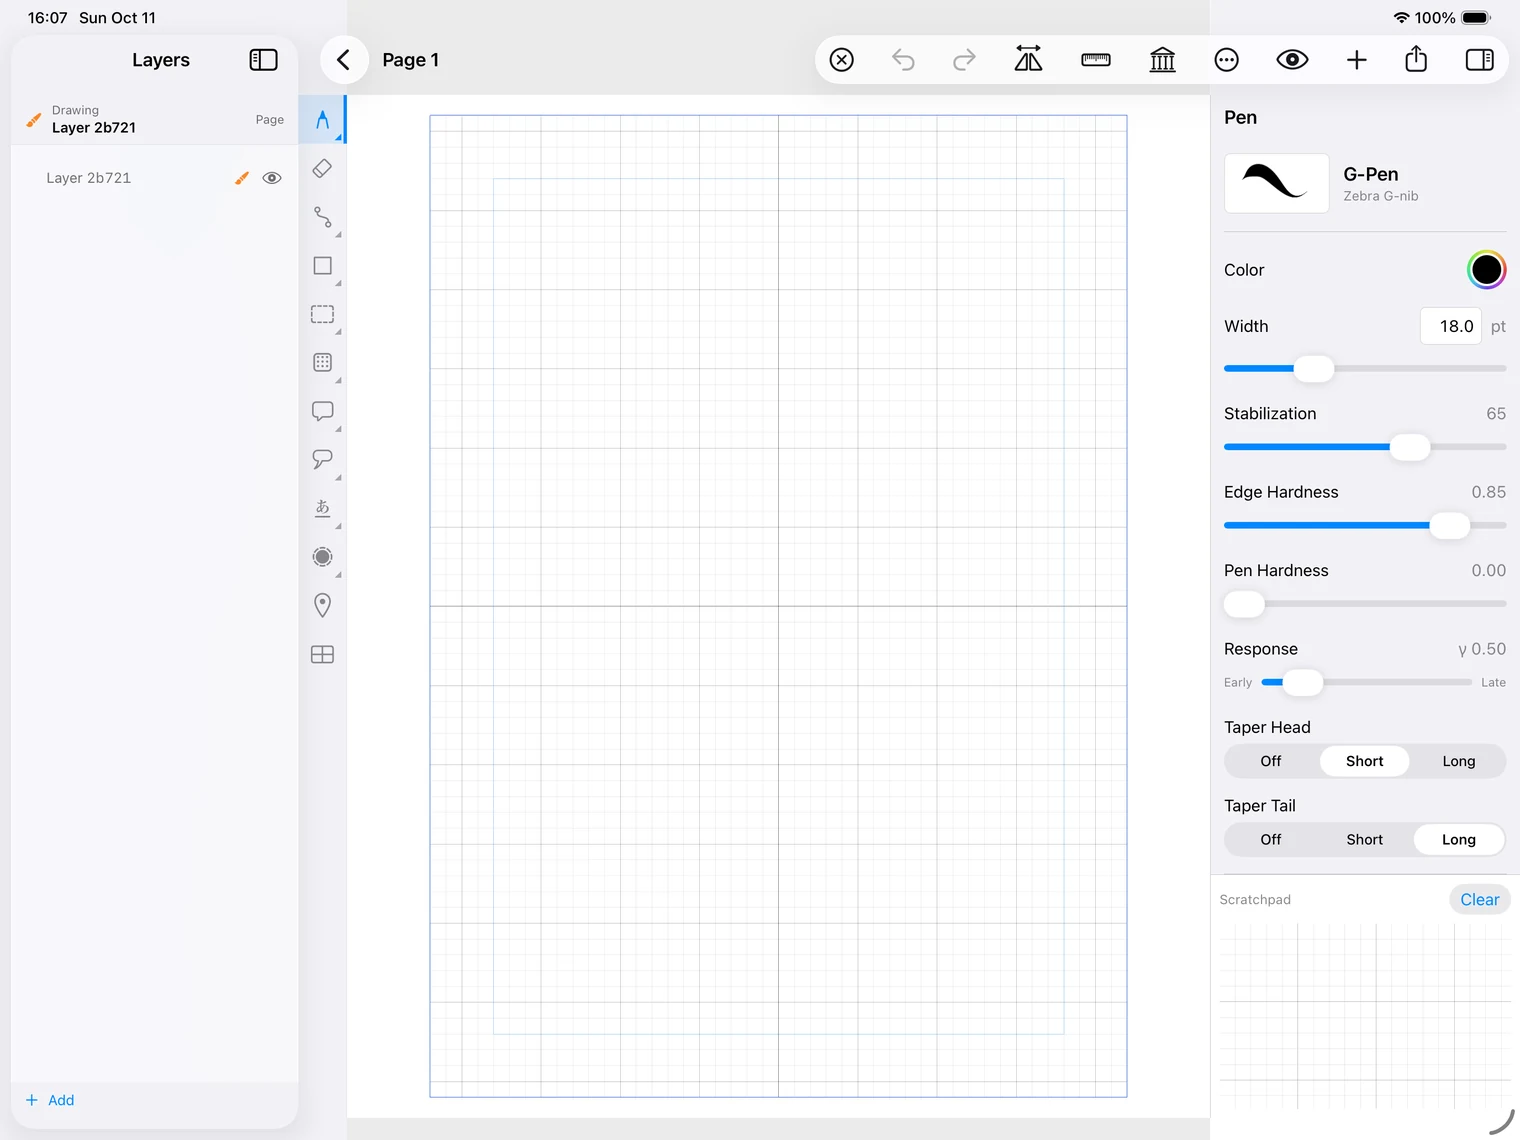
On iPad the editor is laid out the same way. Undo and redo are the two curved arrows in the toolbar; pinch with two fingers to zoom, and drag with two fingers to move the page.
2. Make the panels
Choose the last tool in the strip, the one that looks like a window with four panes. A button appears on the page: Create Frame Layout. Press it.
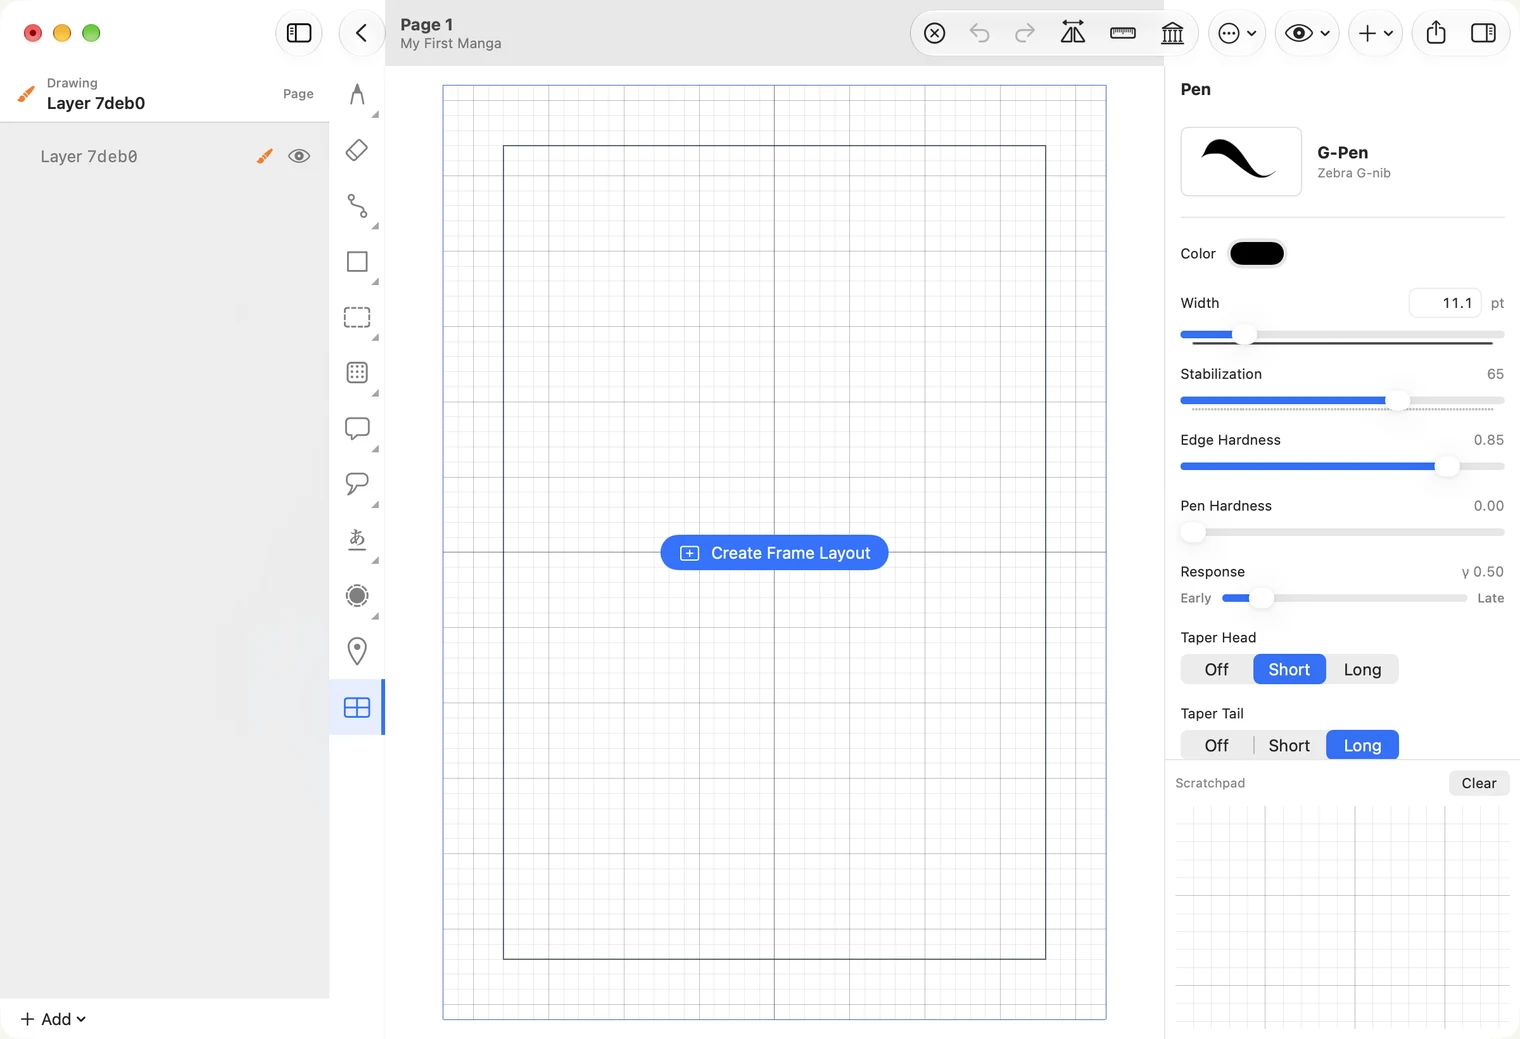
The page now has one big panel. To cut it in two, drag across it: start to the left of the panel, about halfway down, and end to the right of it. On Mac, hold Shift while you drag for a straight cut; without Shift you get a slanted one.
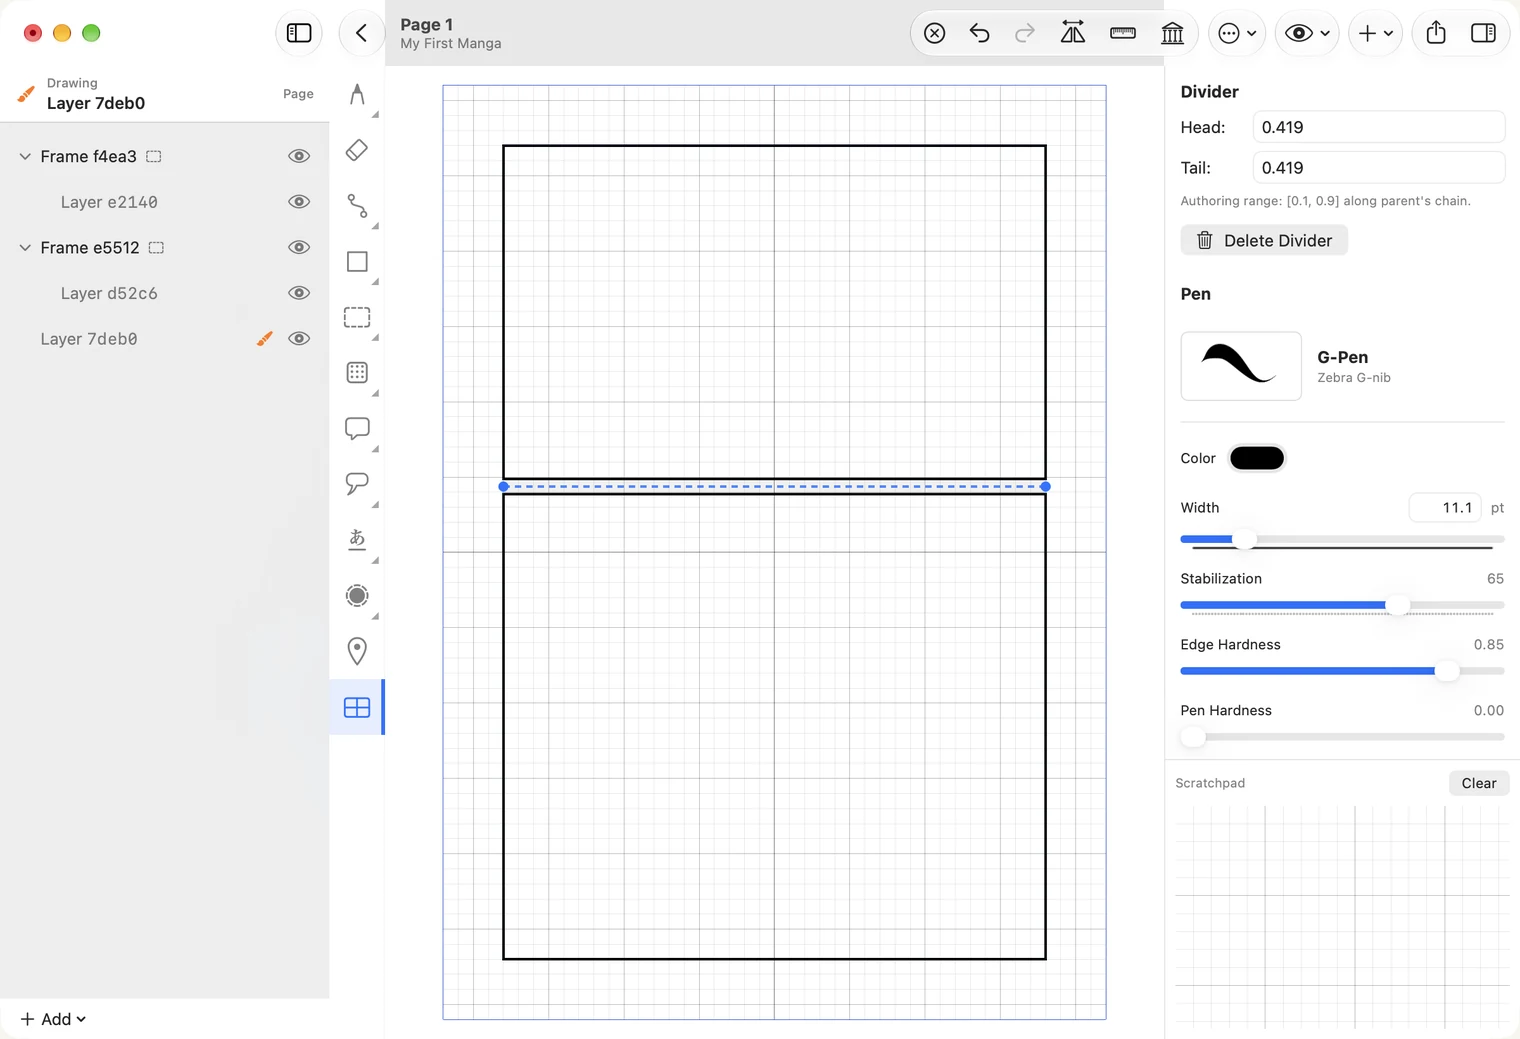
Cut in the wrong place? ⌘Z, and drag again.
3. Choose the panel you draw in
Choose the selection tool, the dashed rectangle in the strip, and click inside the top panel. The panel stays white and the rest of the page goes grey: the grey shows where your drawing will be cut off.
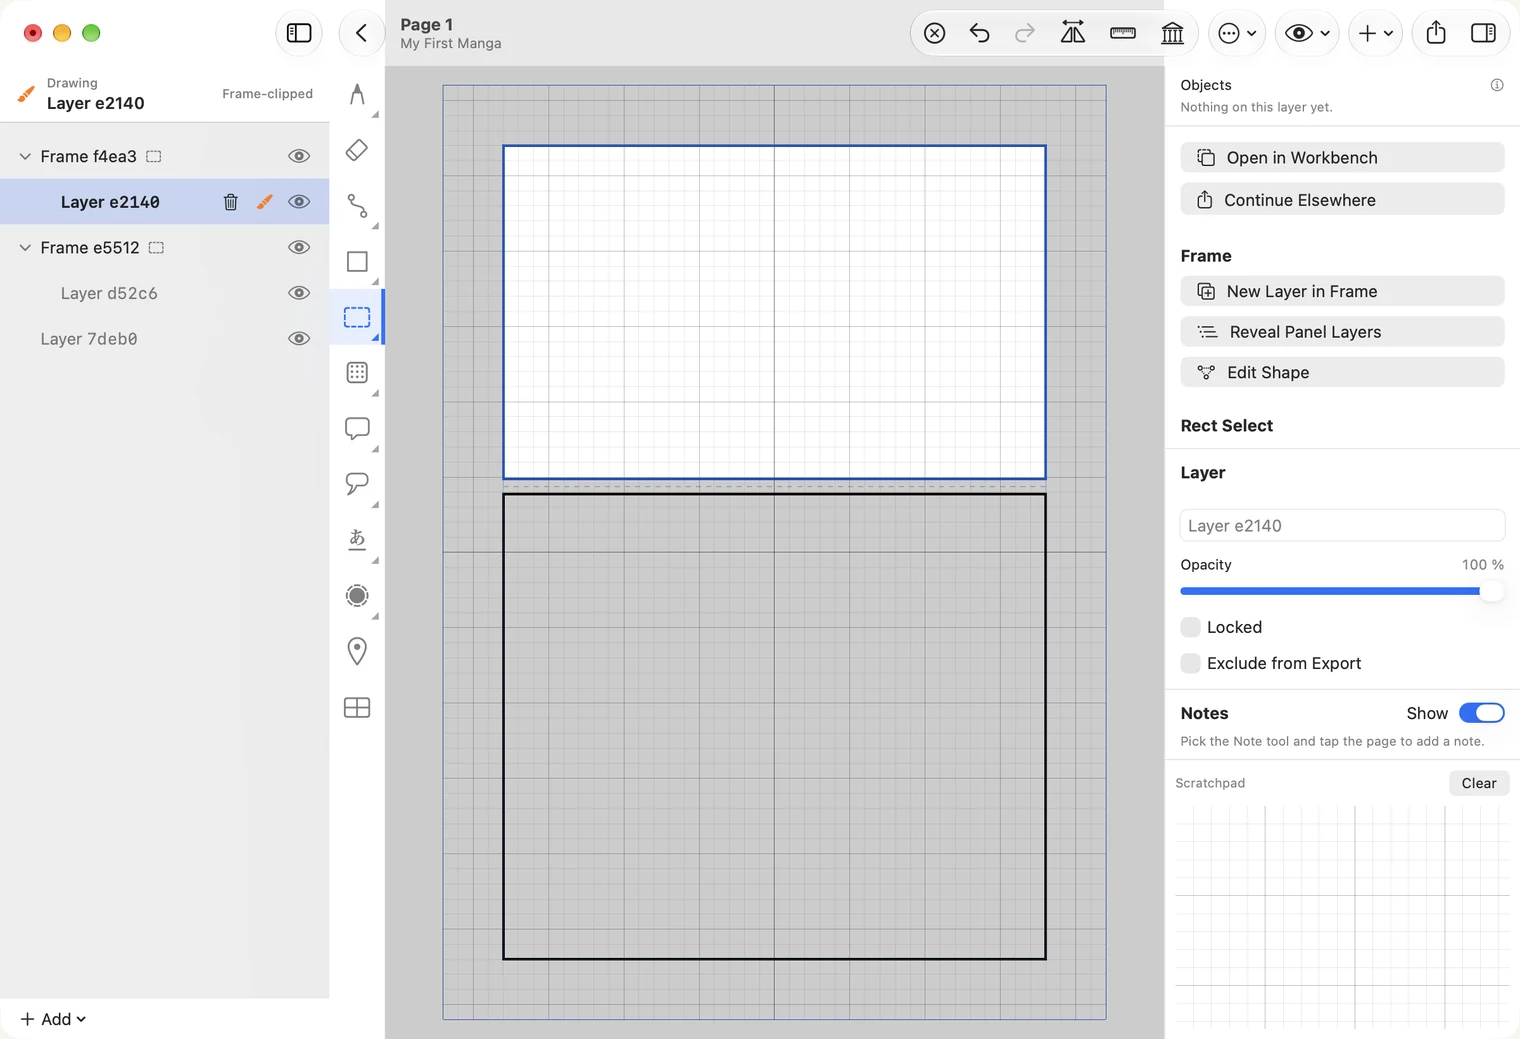
This is the step most people miss. On the left, the layer under that Frame is now selected; you can also click it there. If a layer outside the frames is selected instead, your drawing is not kept inside the panel.
4. Draw
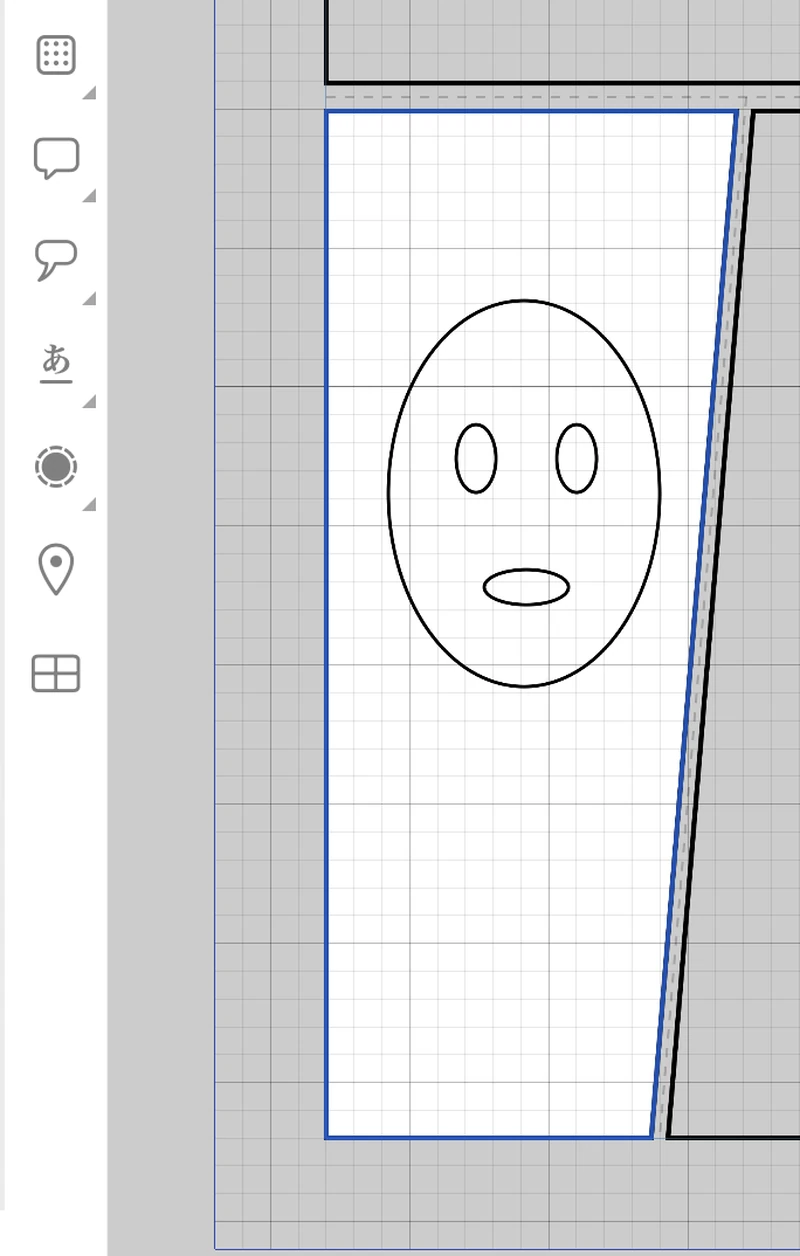
Keep it tiny: a face is enough for a first page.
- With a pen (Apple Pencil on iPad, a pen tablet on Mac) — choose the first tool in the strip, the brush, and draw.
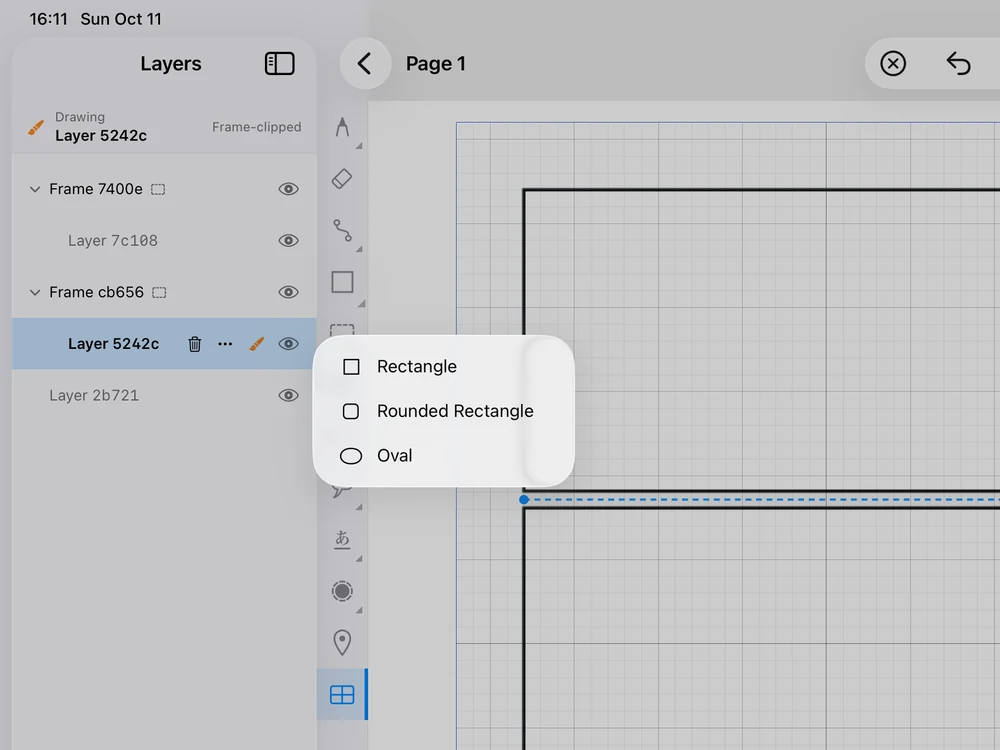
- With a mouse or trackpad — right-click the shape tool, the square in the strip, and choose Oval. Drag from one corner of the face to the opposite corner. Two small ovals make the eyes.
If the shape is not what you want, look at the right side: Color and Width set the line, and Fill chooses whether the inside is filled. If you dragged and see nothing, the line is too thin: raise Width.
On iPad, touch and hold the shape tool to see its kinds. Shapes are drawn with Apple Pencil too: a finger moves the page and does not draw.
5. Add a speech balloon
Choose the balloon tool, the speech bubble in the strip. Drag from one corner of the balloon you want to the opposite corner.
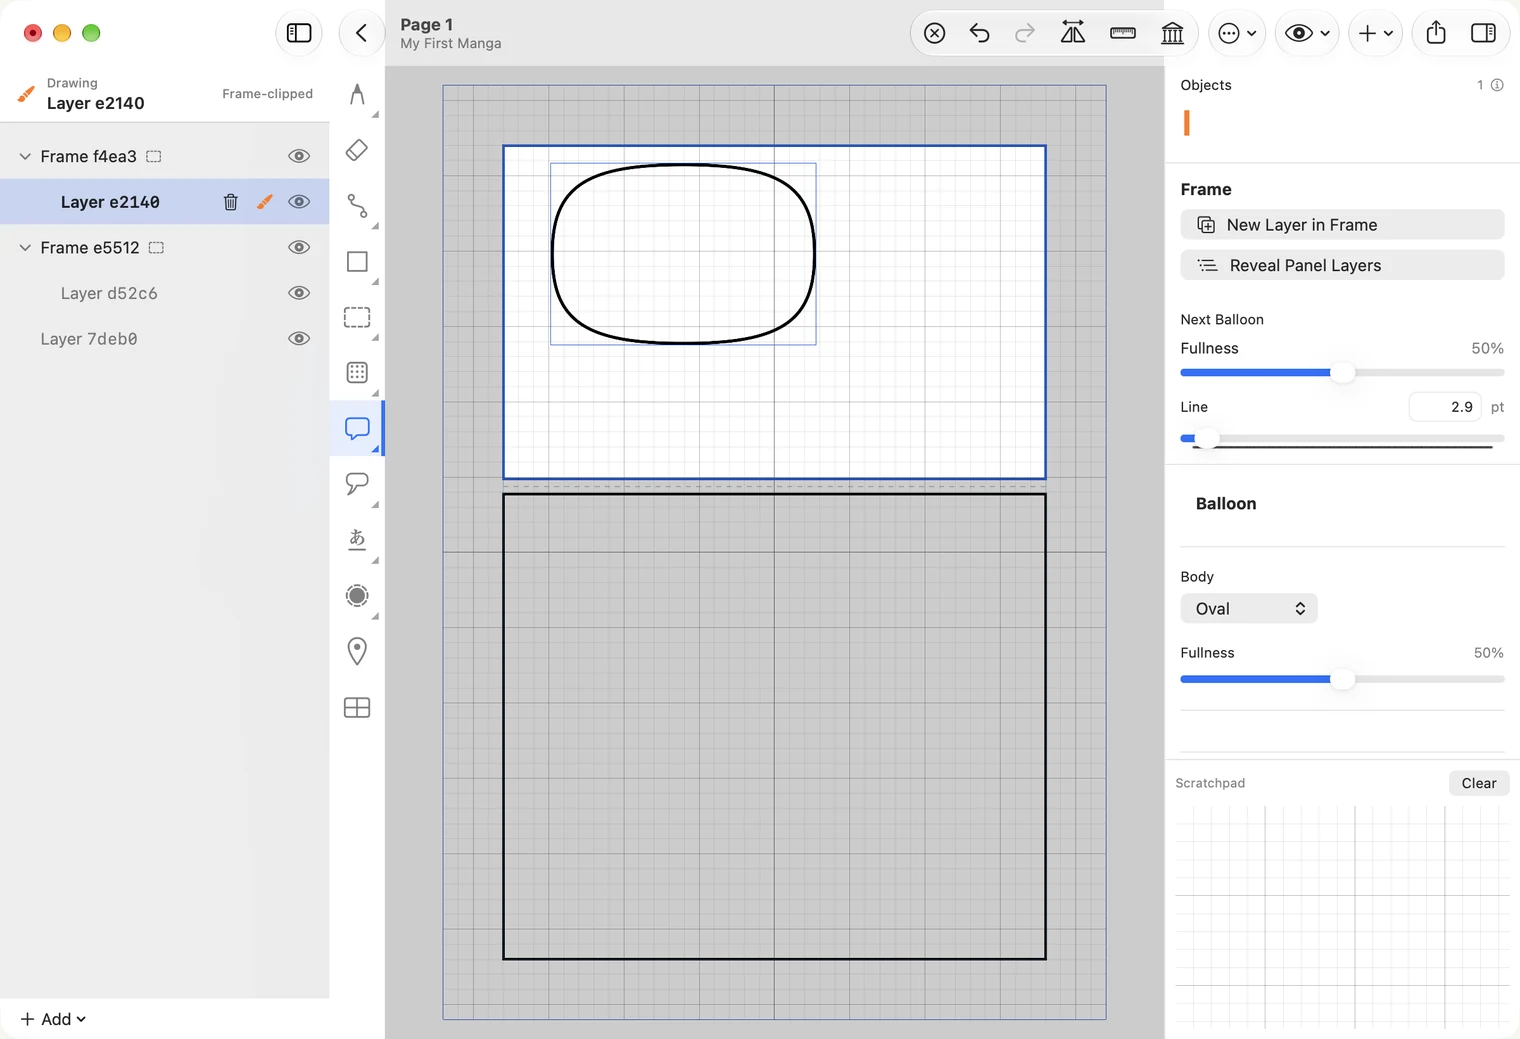
The balloon is one object. With the selection tool you can move it and resize it later. A tail is added with the tail tool, just under the balloon tool; see Balloons and tails.
6. Put words in it
Choose the text tool, marked あ. Click inside the balloon and type.
If your text comes out vertical or very small, look at the right side while you are still typing: set Direction to Horizontal, and drag Size up until the words fit.
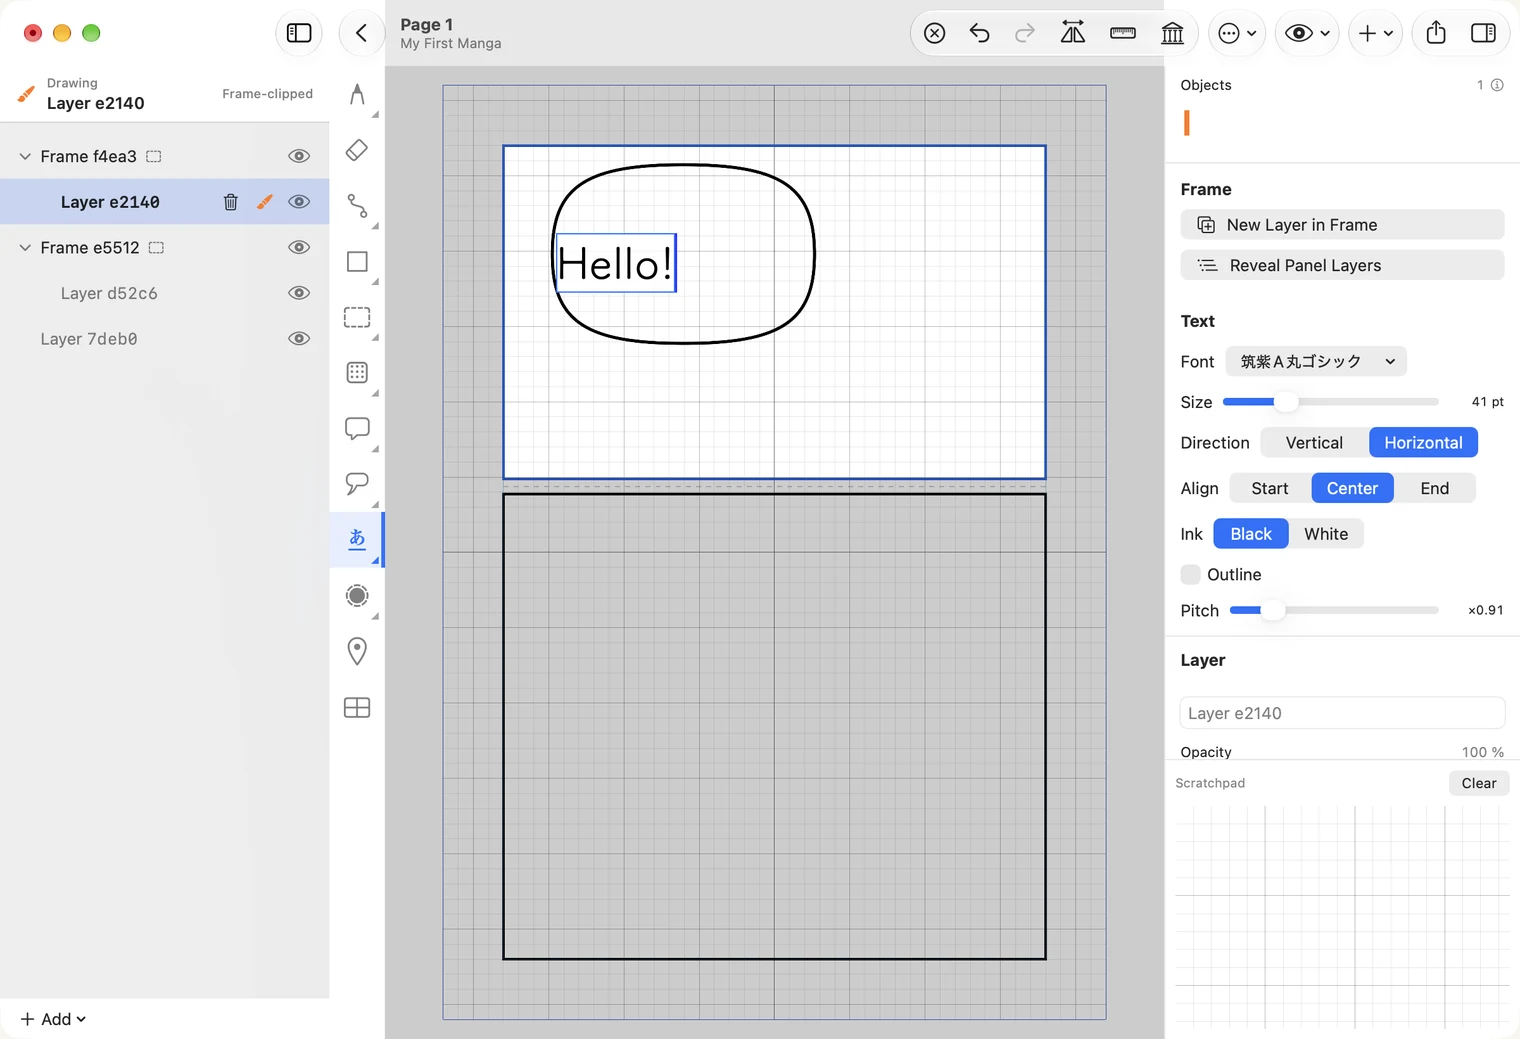
Click anywhere outside the text to finish. Your words are kept; to change them later, see Text.
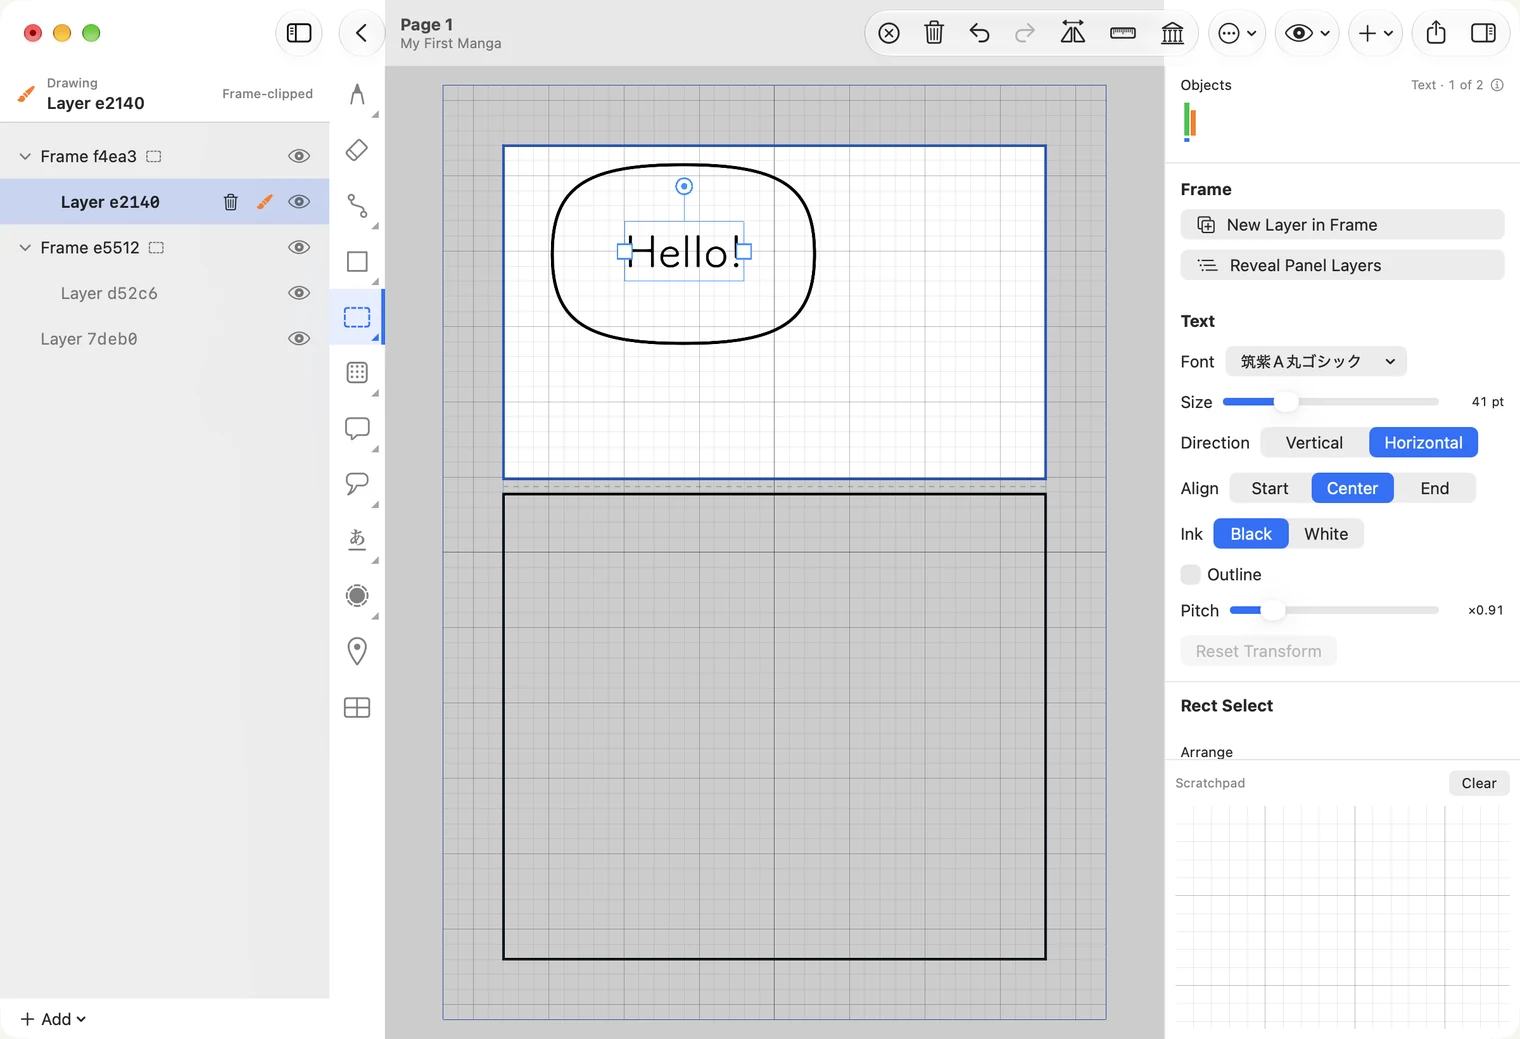
The words do not centre themselves in the balloon. Choose the selection tool, the dashed rectangle in the strip, click the text, and drag it until it sits well.
7. Optional: add a tone
A tone is the grey of manga: dots laid over an area. Choose the panel as in step 3, pick the tone tool, the square of dots in the strip, and drag across the area you want grey.
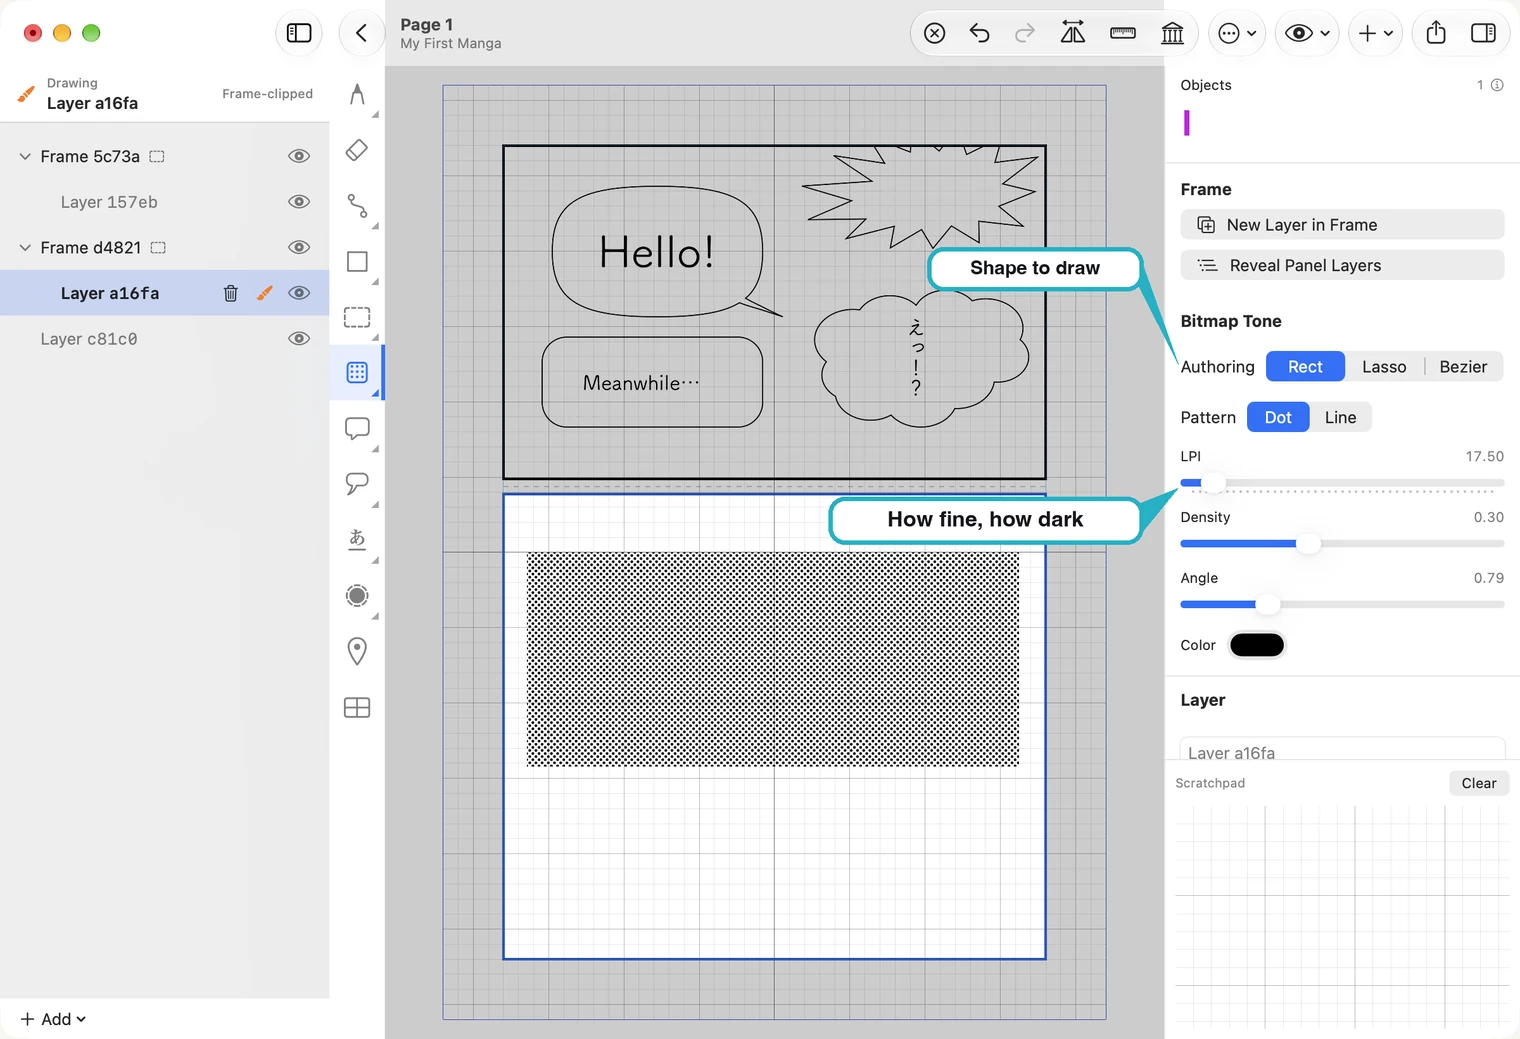
The sliders on the right make it finer or darker, and you can change them later. More in Tones.
That is a page
Two panels, a drawing, a balloon with words: a finished page. There is no Save: MangaLoft keeps your work as you go. Press the back arrow at the top left to return to the page list, where the page now shows what you drew.