Balloons and tails
Speech balloons, their tails, and reshaping them.
Four kinds of balloon
The balloon tool is the speech bubble in the strip. Right-click it to choose the kind (on iPad, touch and hold), then drag from one corner of the balloon to the opposite corner.
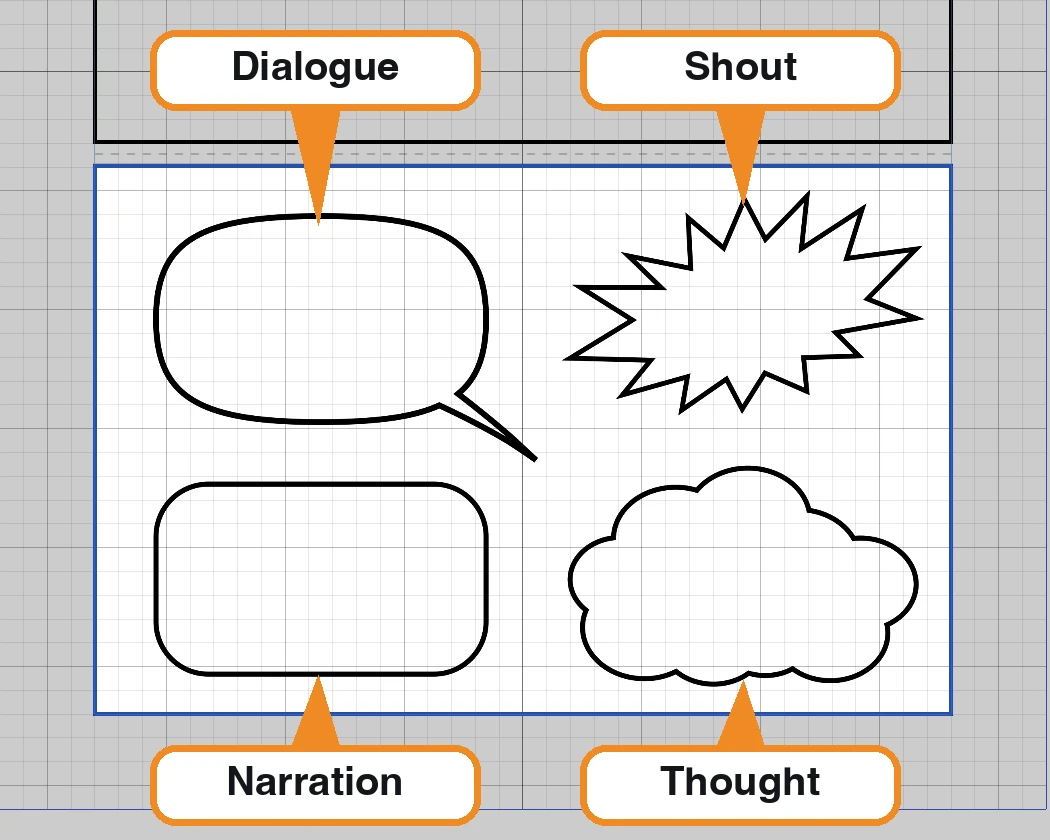
- Dialogue — the everyday oval.
- Narration — a box, for the storyteller's voice.
- Thought — a cloud.
- Shout — a burst.
Choose the panel first (see Your first page, step 3), or the balloon lands in whichever layer is selected.
Reshape a balloon
Choose the selection tool and click the balloon. Handles appear around it, and its shape controls appear on the right.
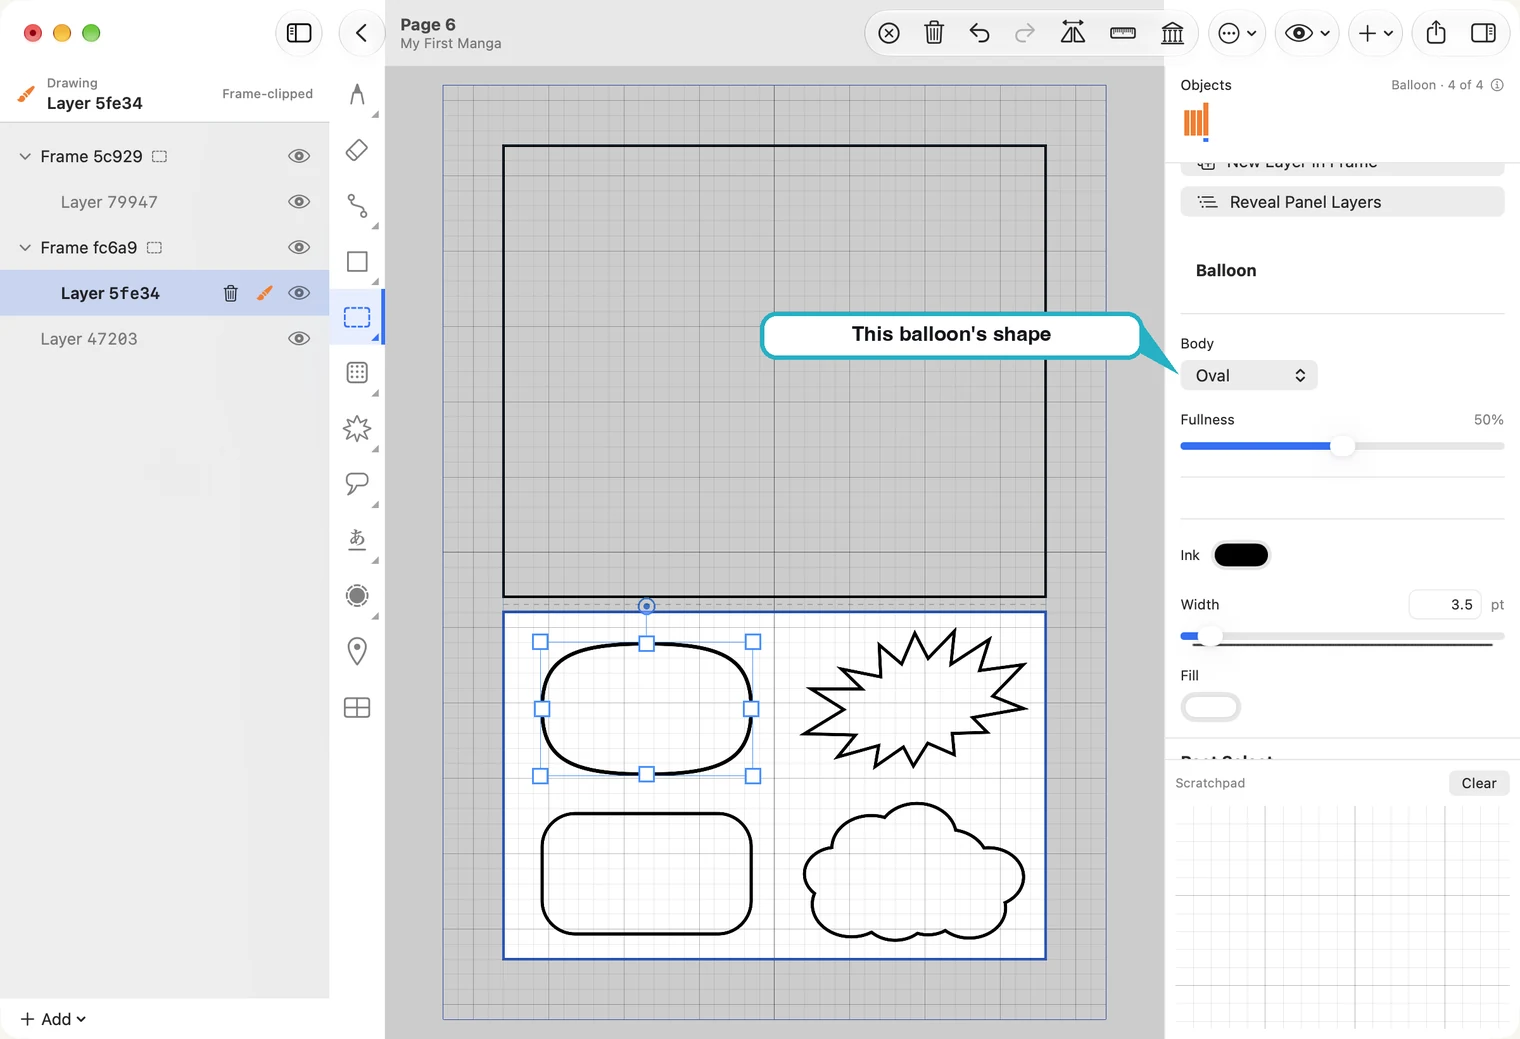
- Drag the balloon to move it; drag a handle to resize it.
- Body swaps the shape: Oval, Rectangle, Cloud or Burst. The balloon keeps its place and size.
- Ink and Width set the balloon's line. The balloon tool has the same Line setting for the next balloon you draw.
- Each body has its own sliders. An oval has Fullness: turn it up and the oval squares out to hold more words. A burst has Spikes and Spike Depth; a cloud has its lobes, and Re-roll draws a different cloud of the same kind.
- A balloon has no points to drag. Its sliders and Re-roll are how you shape it: keep rolling until you like one.
Add a tail
The tail tool is just below the balloon tool. Draw one stroke: start on the balloon and end where the speaker is. The start of the stroke is the wide end.
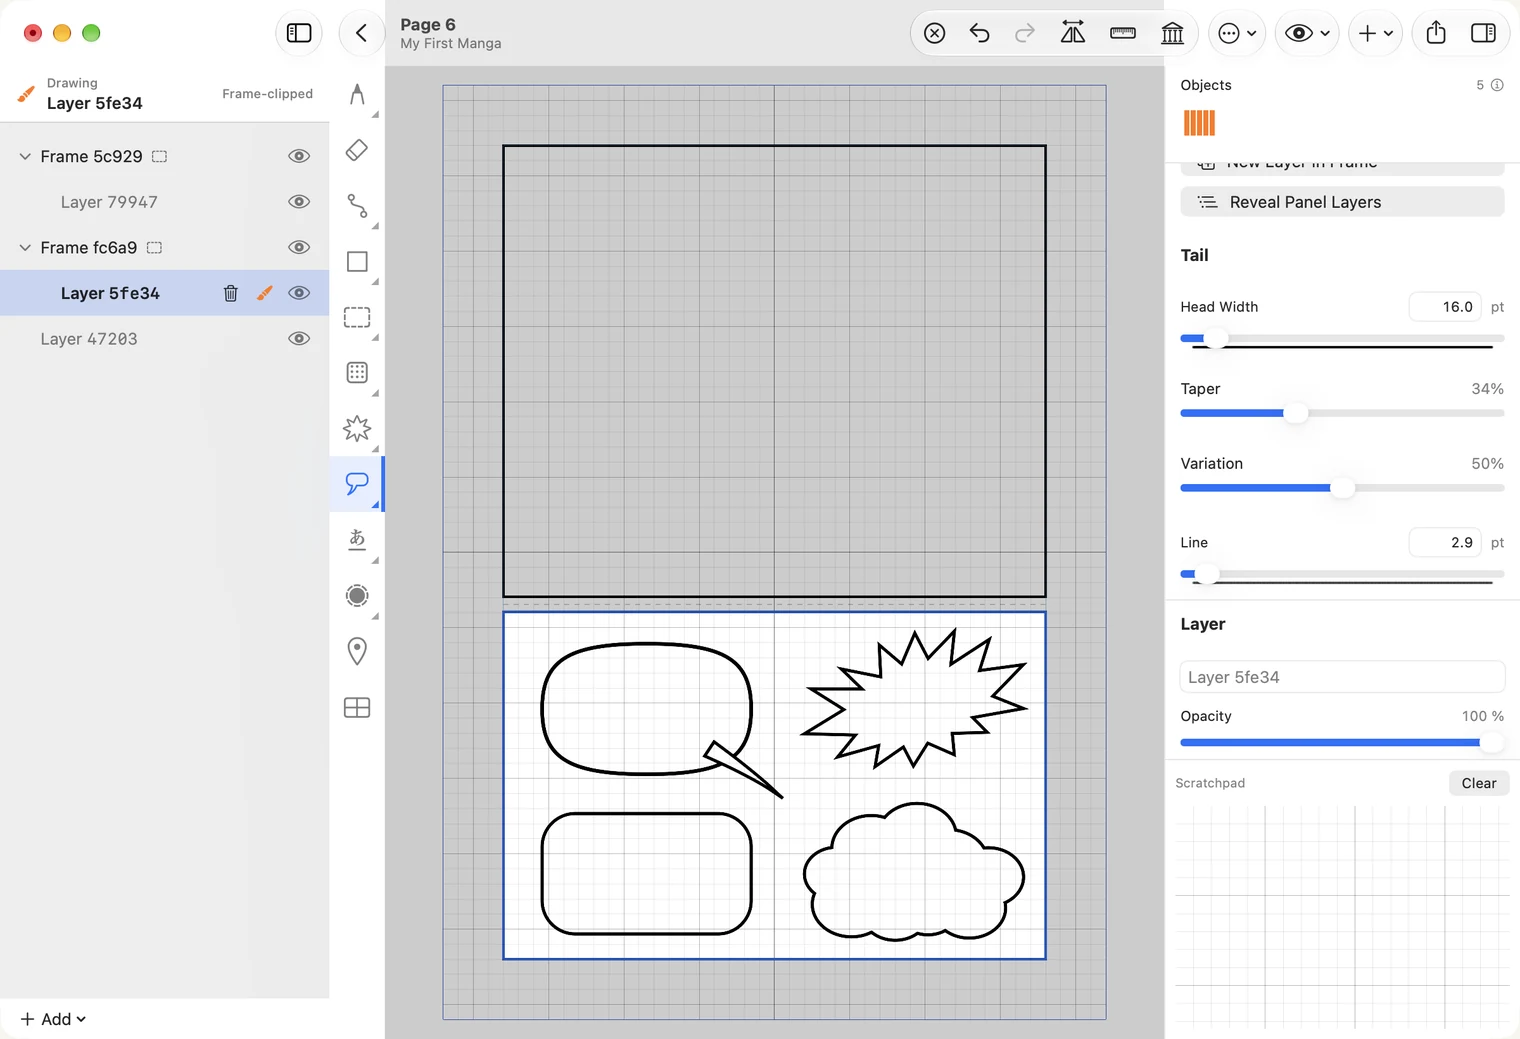
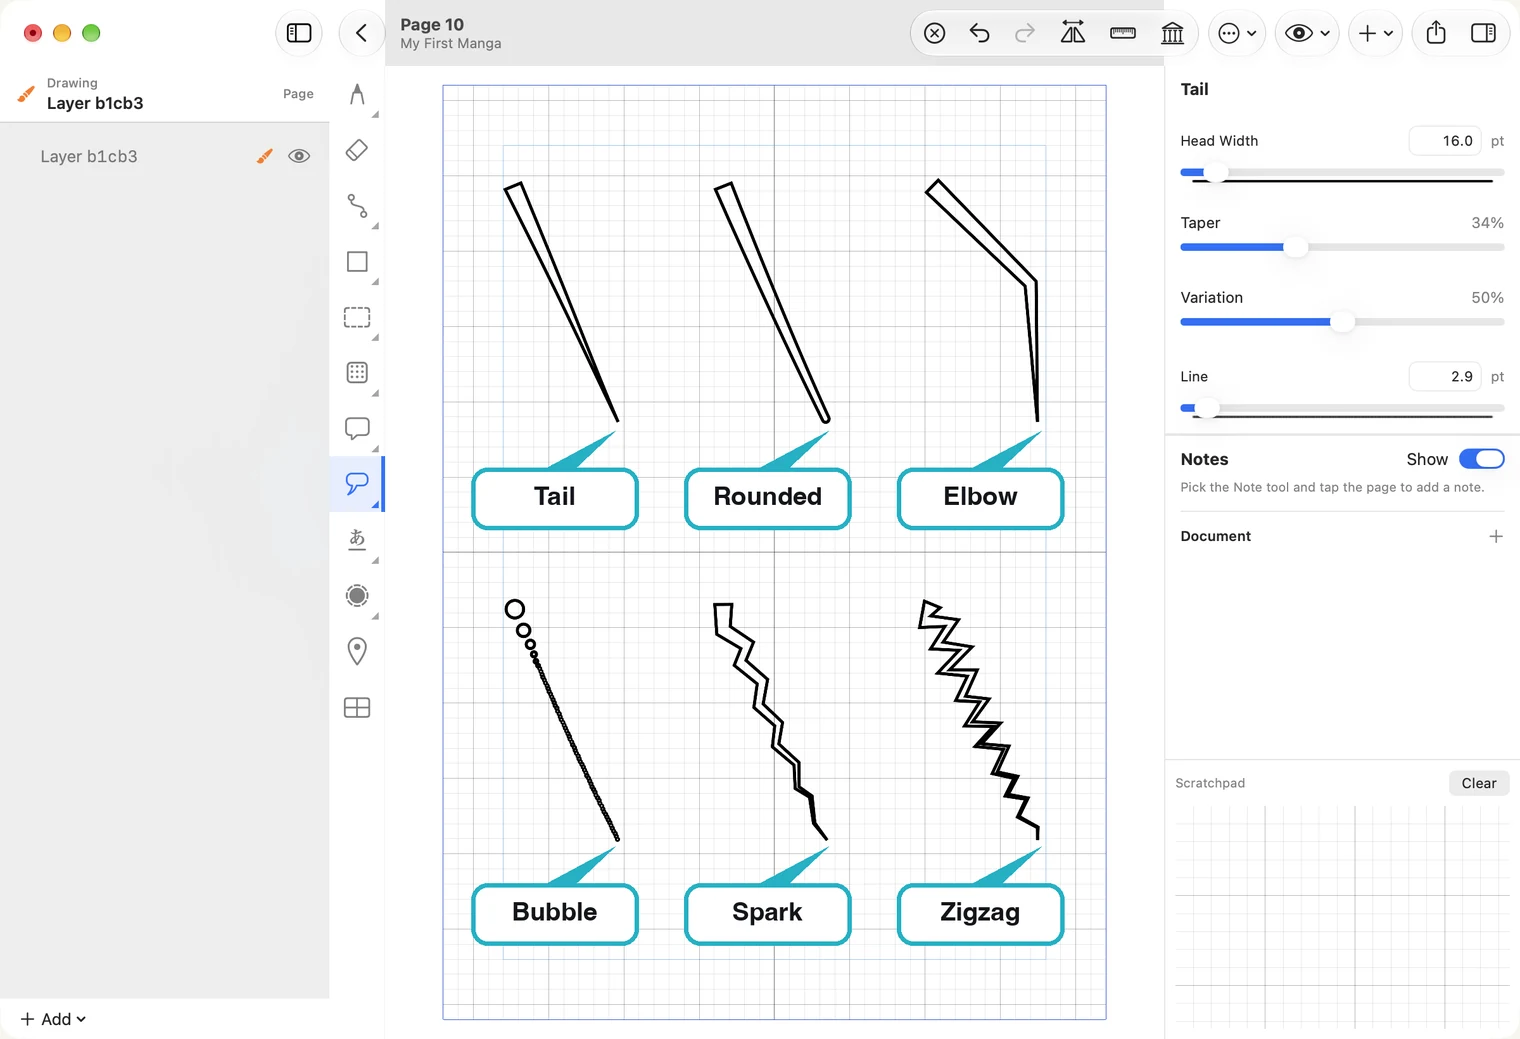
The plain tail is called Simple. Right-click the tail tool for the other kinds: Rounded, Elbow, Bubble (a trail of bubbles for a thought), Spark, Zigzag, and Join, which connects two balloons.
A mouse draws a tail as well as a pen does.
Make the balloon and tail one shape
A tail is its own object, so at first you see where it crosses the balloon's outline. Unite joins them into one outline.
- With the selection tool, click the balloon. Click the balloon first: the united shape keeps the look of the first thing you select.
- Hold Shift and click the tail, so both are selected.
- Under Path Operations on the right, press Unite, the button with two shapes merged into one. It is also in the Path menu.
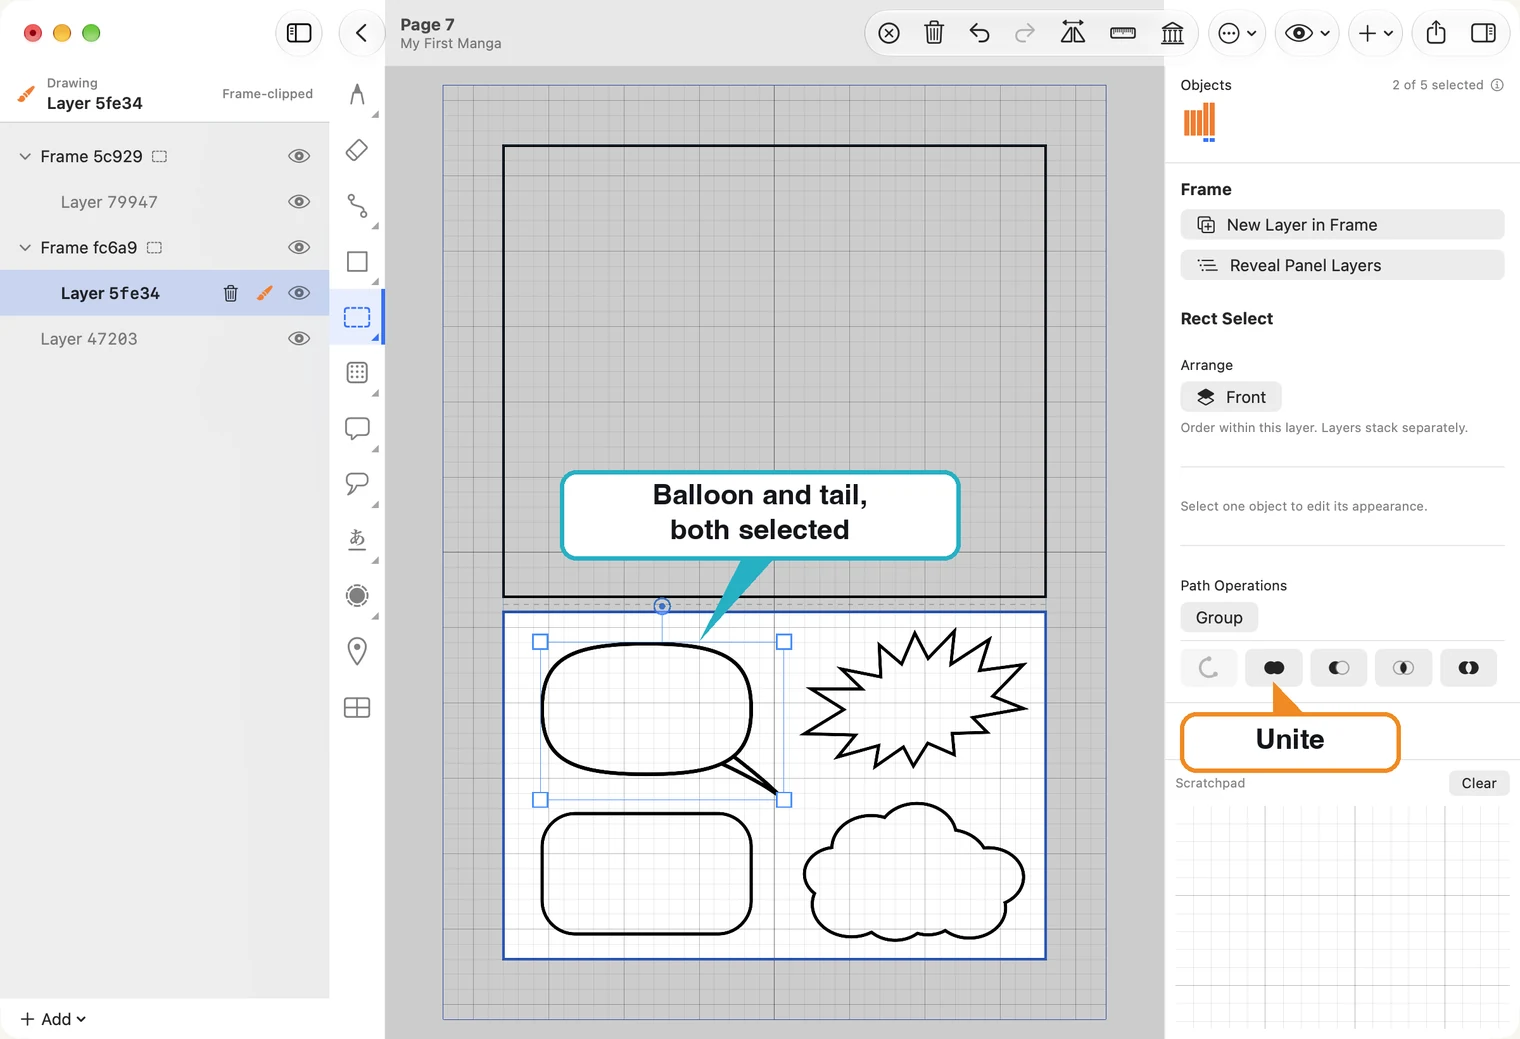
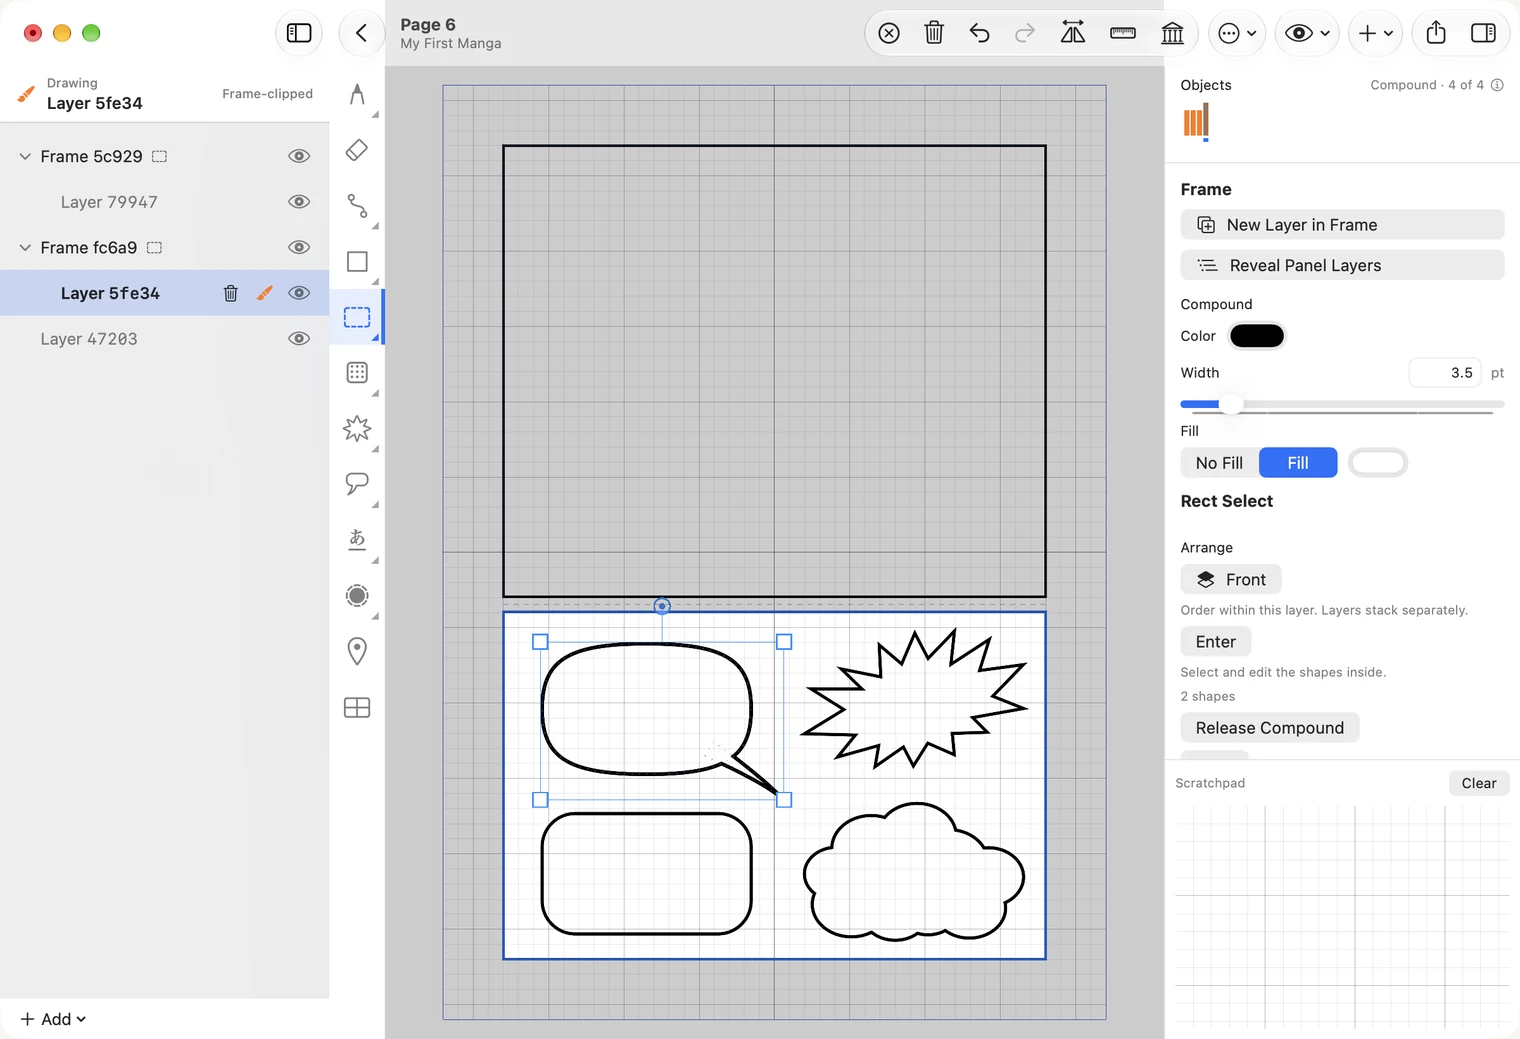
If Unite answers “Select the object whose look to keep first, then Shift-click the rest”, the two were not selected in that order: click the balloon, then Shift-click the tail.
The balloon and tail are still there inside the united shape. Release Compound separates them again, and the Enter button on the right lets you select one of them to change it.
Subtract does the opposite: it cuts one shape out of the other. Subtract a tail from a balloon and the tail becomes a notch, a tail that points inward.
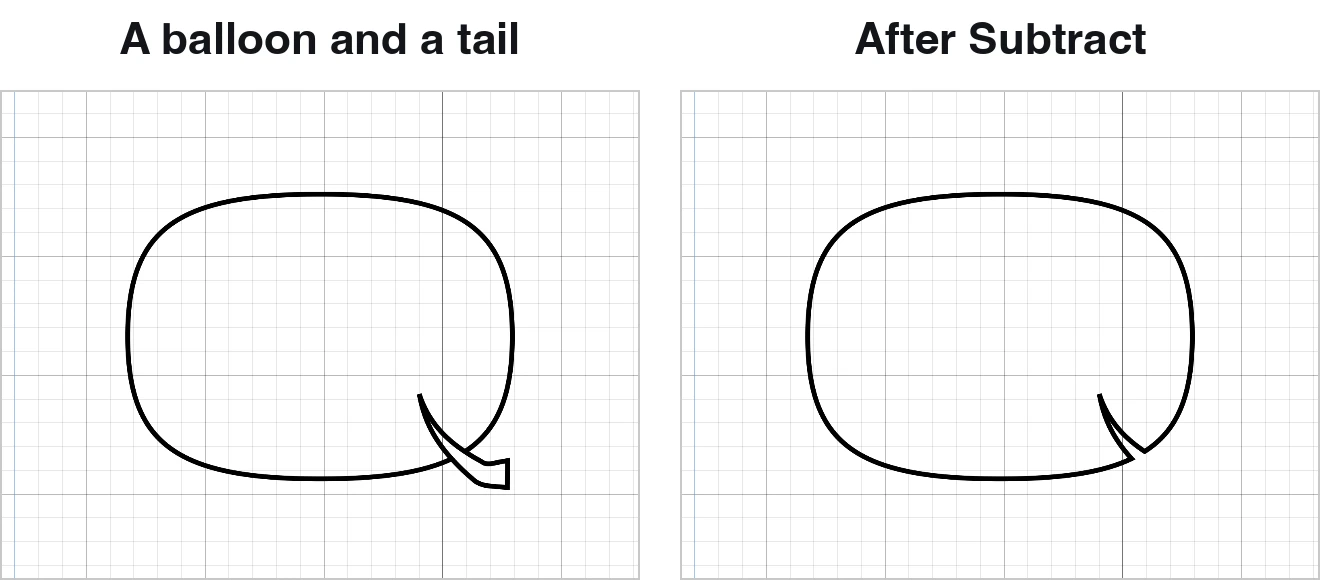
Select the two the same way: click the balloon, Shift-click the tail, and press Subtract. The shape underneath is the one that is kept, and what lies on top of it is cut away, so draw the balloon first and the tail over it. As with Unite, both are still inside: Release Compound brings them back.
On iPad there is no Shift key, so select the two together another way: with the selection tool, start on an empty part of the page and drag the Pencil around both. If their line or fill settings differ, combining a marquee selection may be refused. With a keyboard attached, select the balloon first, then Shift-tap the tail to combine them using the balloon’s appearance.
Adjust a tail
Select a tail and the right side shows its Style, Head Width and the sliders that style has. Re-roll draws a different version of the same tail.
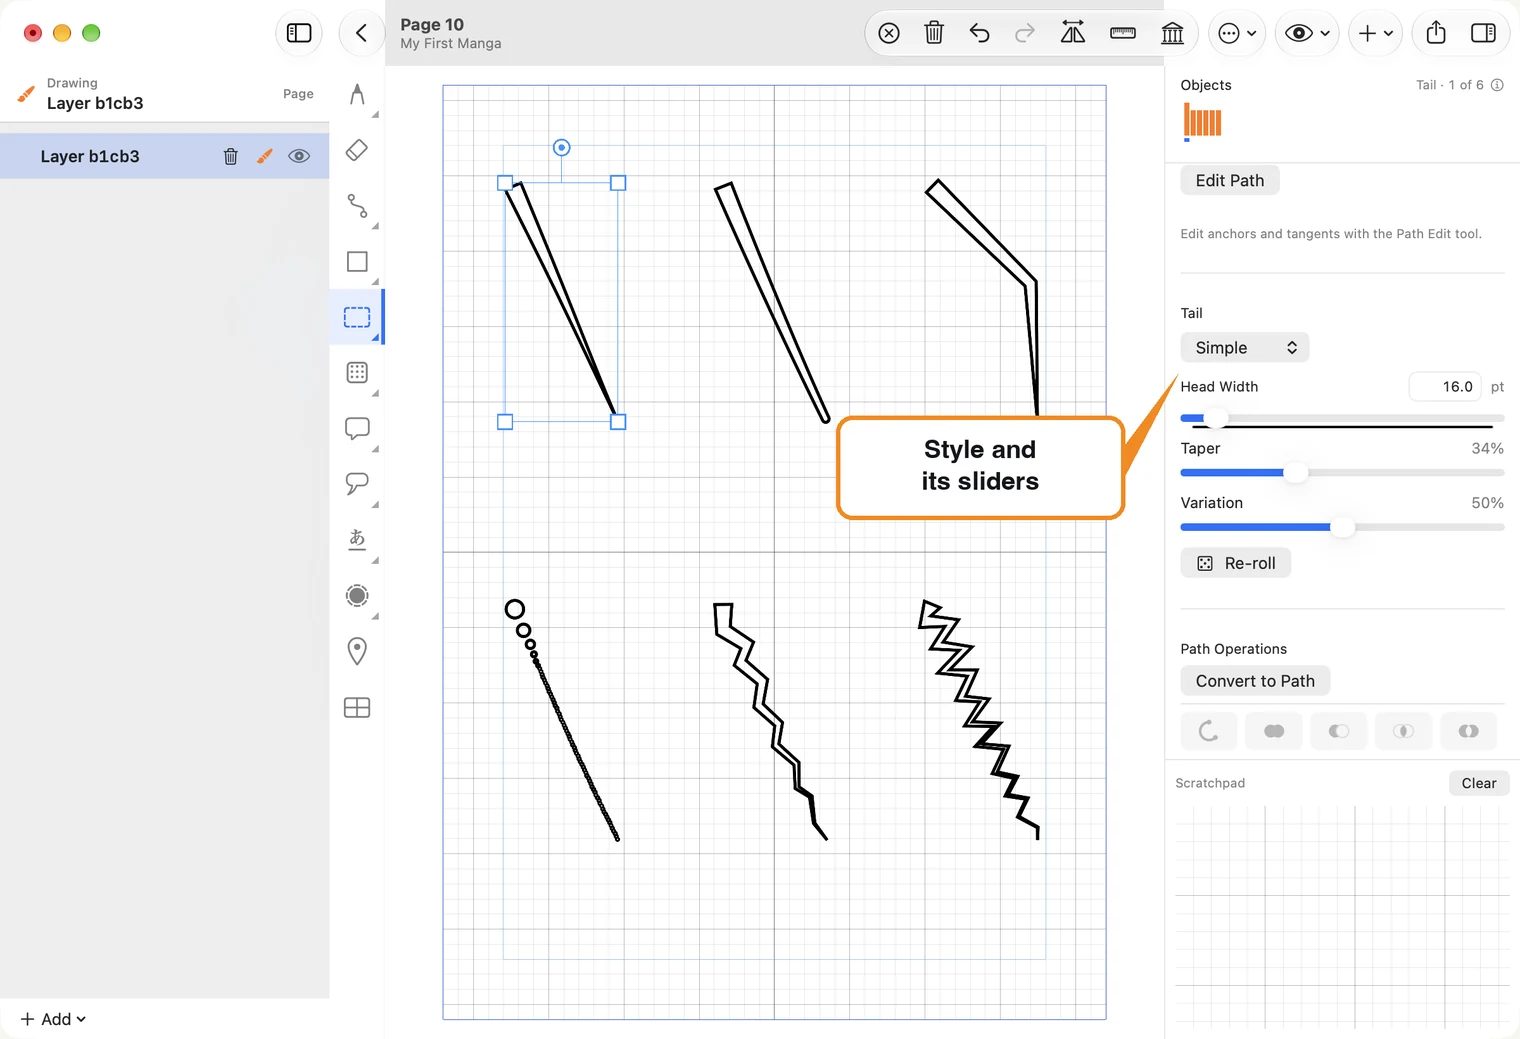
Style changes the kind of a tail you have already drawn, so you do not need to draw it again.
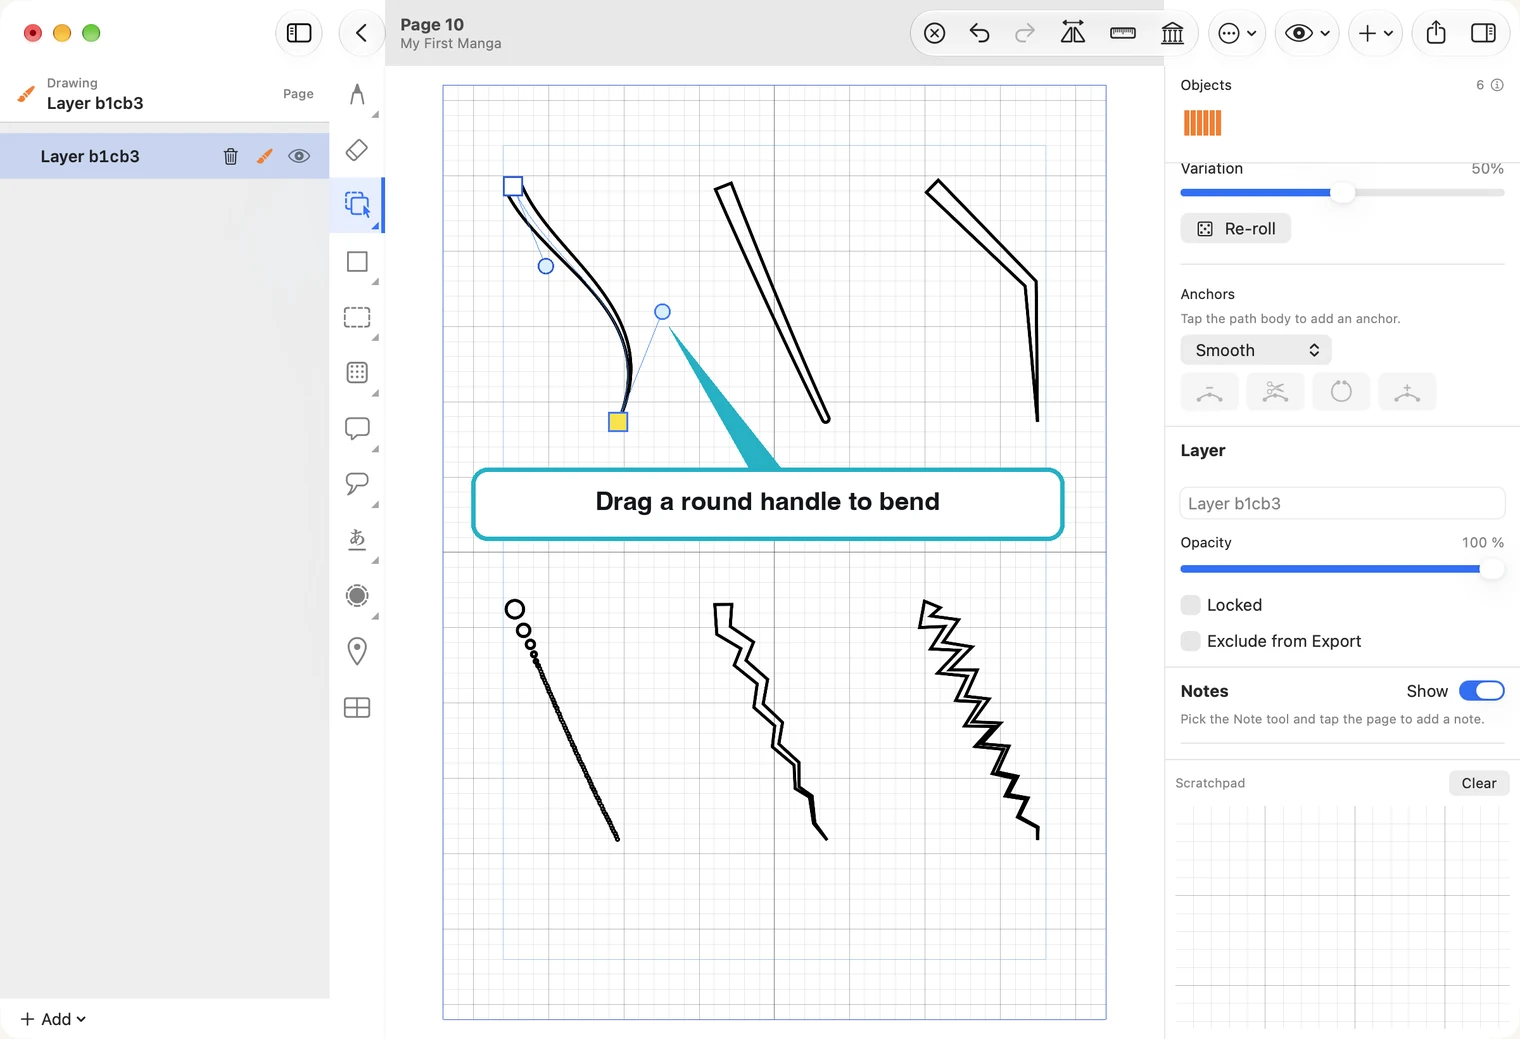
To bend a tail, press Edit Path on the right. The tail shows its centre line: a square at each end and round handles between. Drag a square to move that end; drag a round handle to bend the tail.
Choose the selection tool again when you are done.