Text
Lettering: vertical and horizontal text, ruby, style.
Place text
The text tool is marked あ in the strip. Click where the words should go and type. Click for text that grows as you type; drag instead for a box that wraps the words.
Text is its own object. It does not belong to a balloon: you place the words, then move them until they sit well inside it.
Vertical or horizontal
Manga in Japanese reads top to bottom, so MangaLoft has both directions. If your words come out standing on their side, the text is vertical.
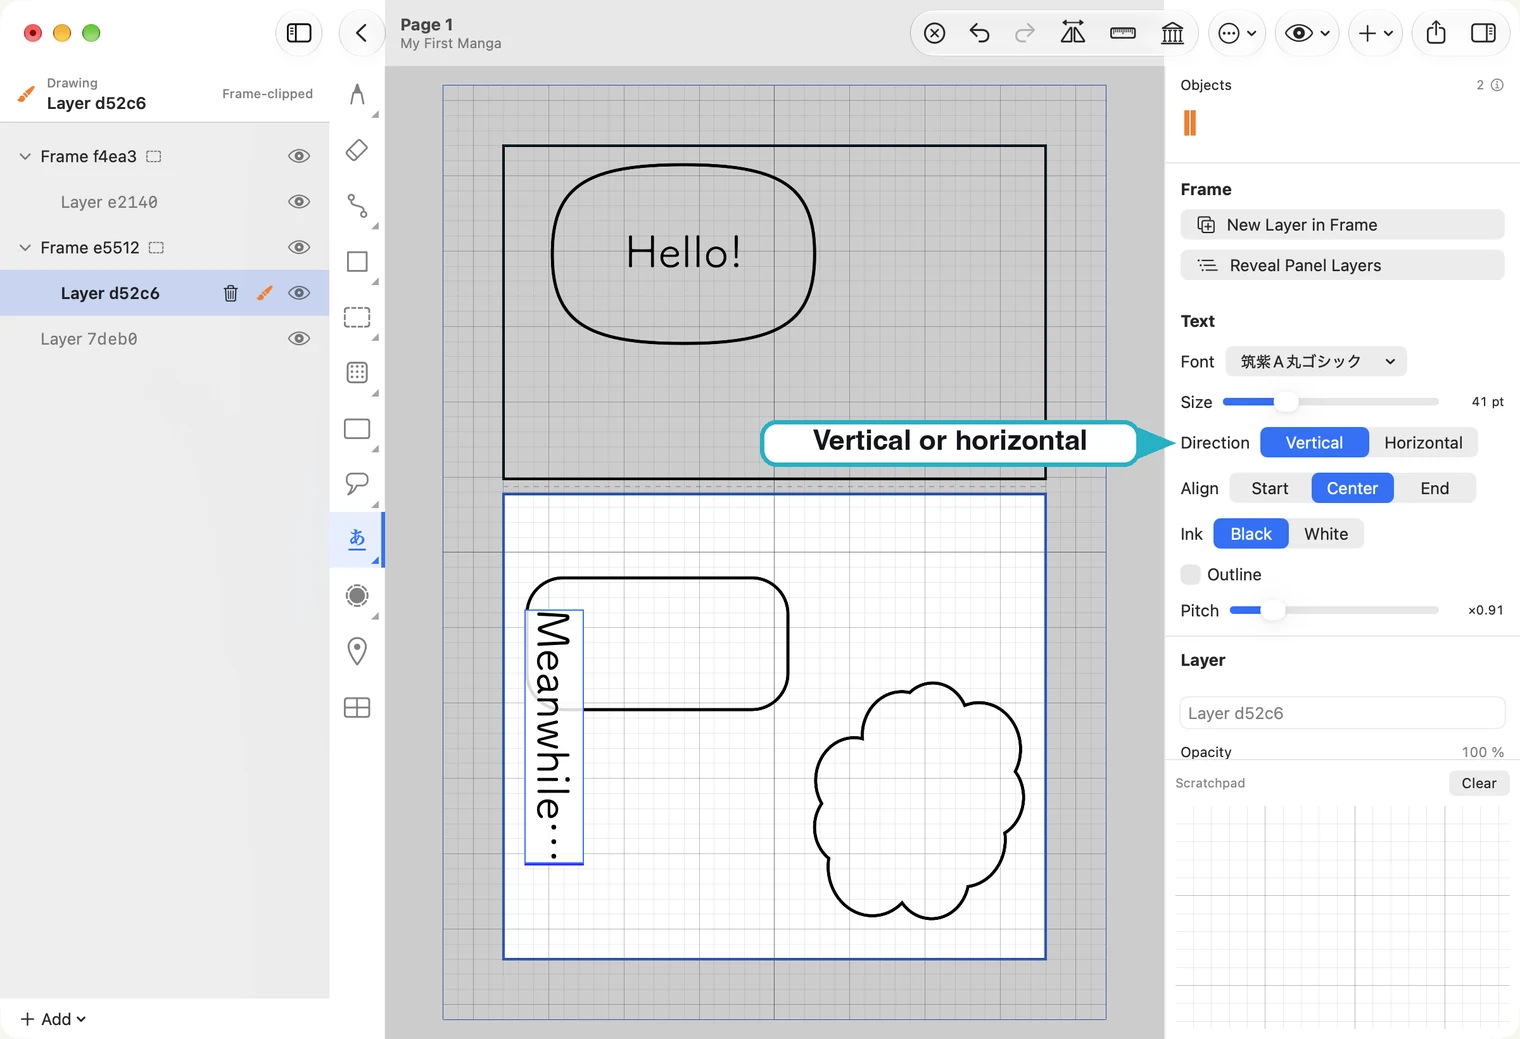
While you are still typing, set Direction to Horizontal on the right, and drag Size until the words fit.
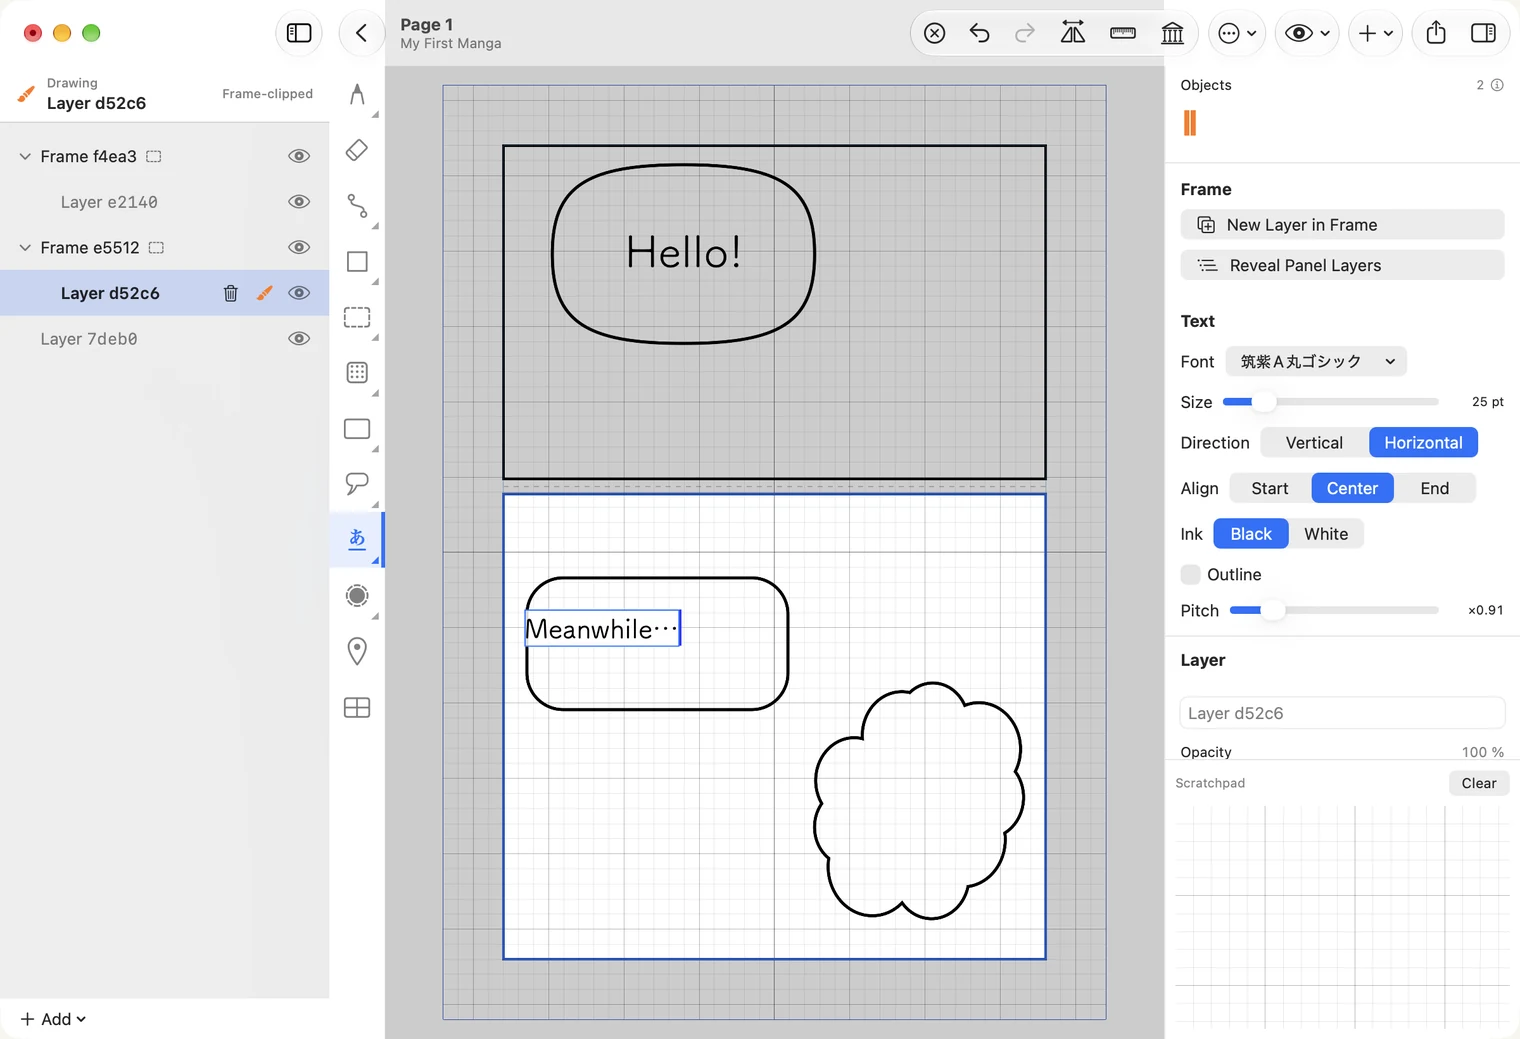
The next text uses the direction selected in the text tool. Changing Direction while typing changes that text box, but does not change the tool’s direction. On Mac, T picks the vertical tool and Shift-T the horizontal one; or right-click the text tool.
Finish, and type again
Click outside the text, or choose another tool, and the text is finished. Return makes a new line. There is no cancel: what you typed is kept, and ⌘Z removes it if you did not want it.
To change the words later, click the text with the text tool, or double-click it with the selection tool.
Move and style a text
With the selection tool, click the text and drag it into place. While it is selected, the right side changes the whole text at once.
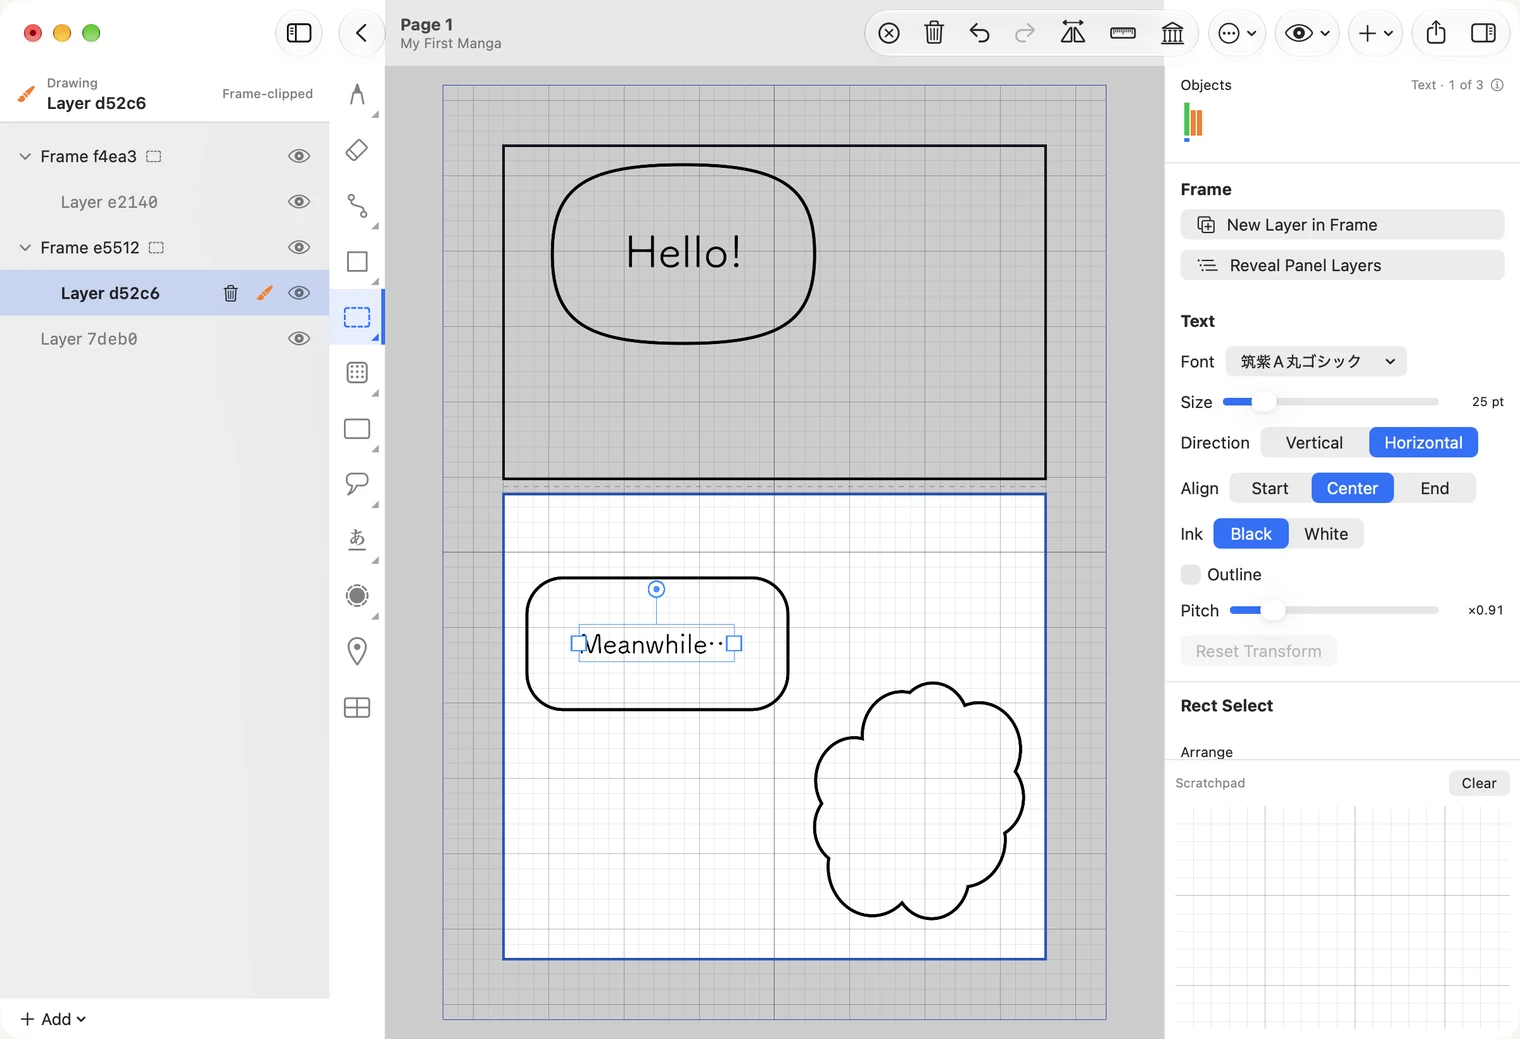
- Font and Size.
- Align — Start, Center or End of the line.
- Ink — black or white letters.
- Outline — a border around each letter. It keeps words readable on top of busy art. Ticking it shows two more settings: Width, how thick the border is, and Rim, whether it is white or black.
- Pitch — the distance between lines.
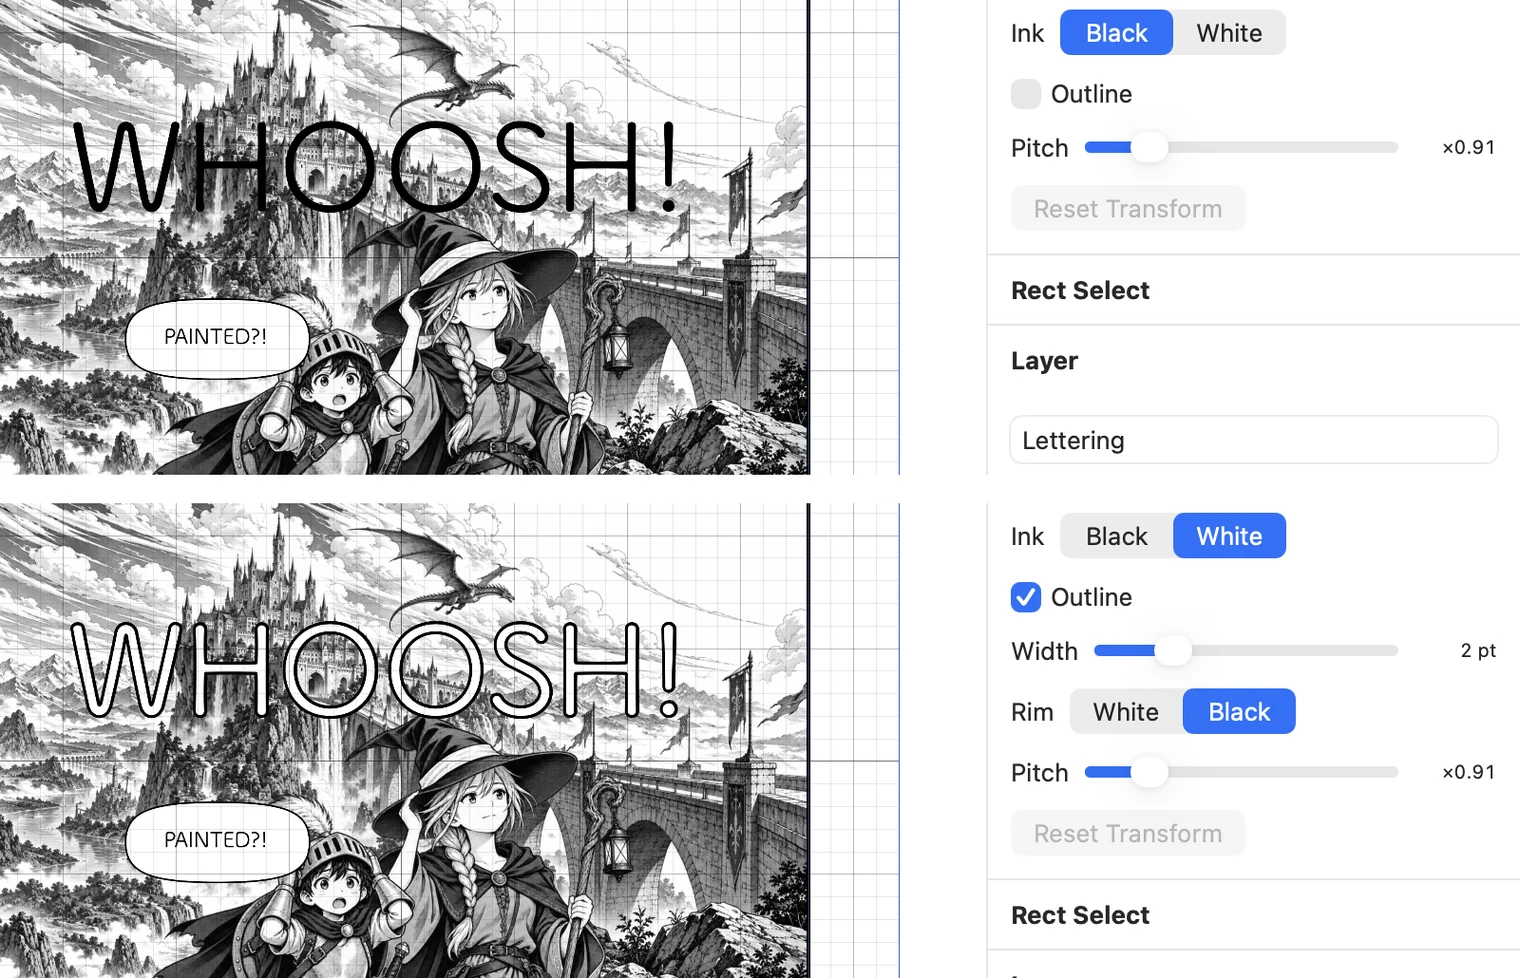
Sound effects and words that sit on the art itself, outside a balloon, almost always want white ink with a black outline, or the reverse.
Japanese: vertical text, ruby and 縦中横
Vertical text starts at the top right and grows to the left, as on a manga page.
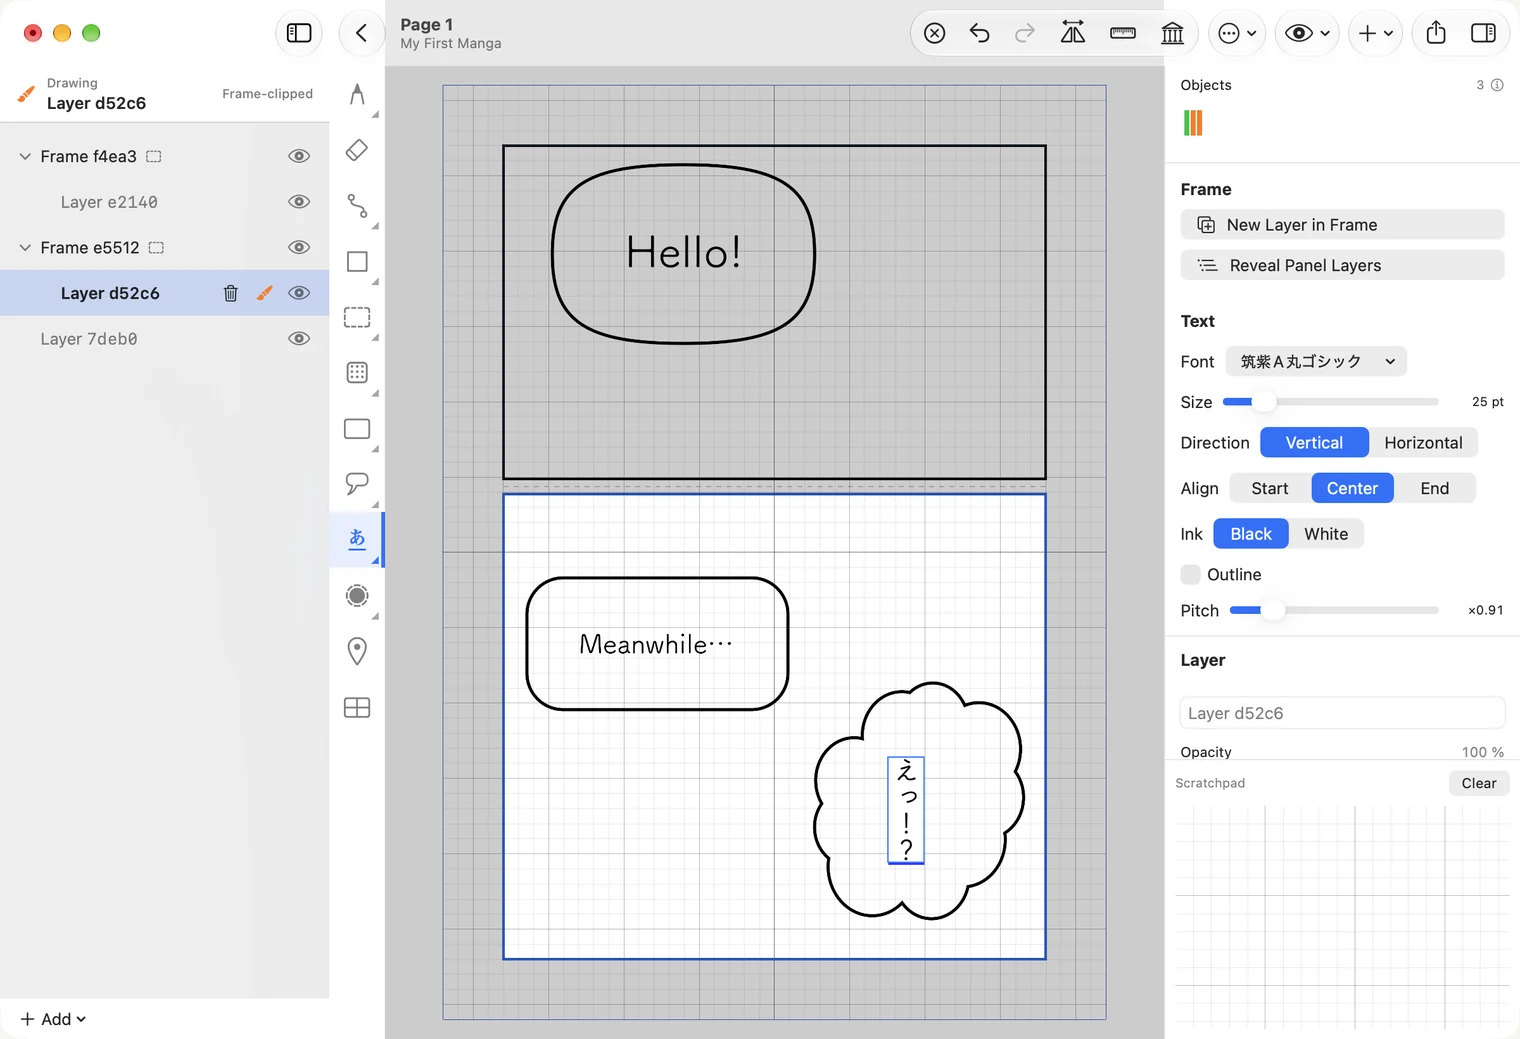
Typed like this, ! and ? stand one above the other. In manga they usually sit side by side in one square. That is Tate-chu-yoko (縦中横): while typing, select the two characters, right-click, and choose it.
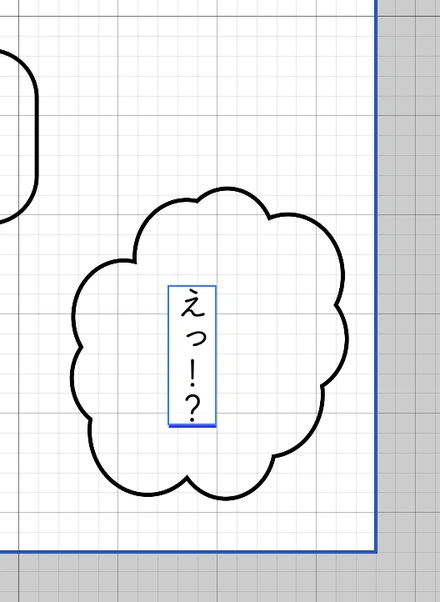
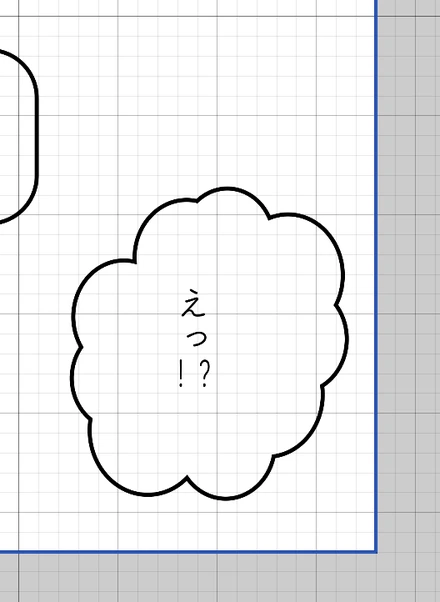
Two things turn by themselves, with nothing to choose: a two-digit number, and a !? pair typed with the plain keyboard characters. The full-width marks !? of a Japanese keyboard do not, which is when you use the menu.
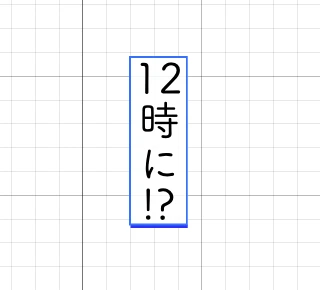
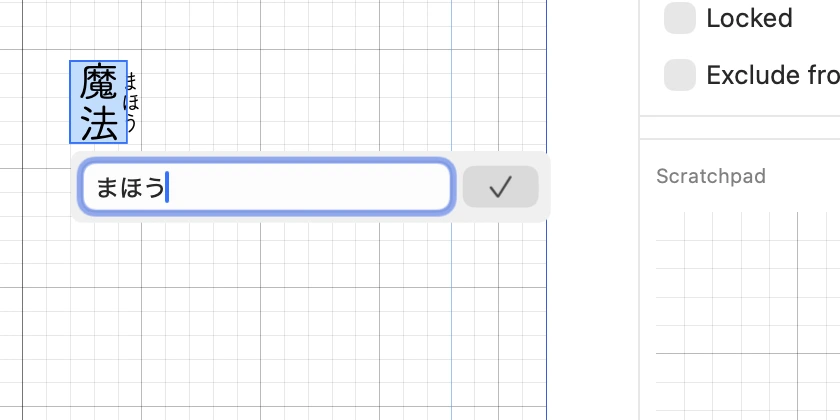
The same menu has Ruby…, which adds a small reading beside the selected characters. A field opens under the text: click in it, type the reading, and press Return or the ✓. The reading appears beside the characters as you type.
On iPad, select the characters and the usual menu appears above them, with Ruby… and Tate-chu-yoko first, then Cut, Copy and Paste. When you have finished typing, tap 完了, at the right end of the bar above the keyboard: it keeps the text and closes the box. Tapping outside the box does the same. There is no cancel; Undo takes the text back.