Frames and panels
Splitting a page into panels and drawing inside them.
Panels are cut, not drawn
In MangaLoft you do not draw panel borders one by one. You start with one panel that fills the page and cut it, the way you would rule lines across a sheet. The gaps between panels stay even by themselves, and each panel keeps its own layers.
Start a layout
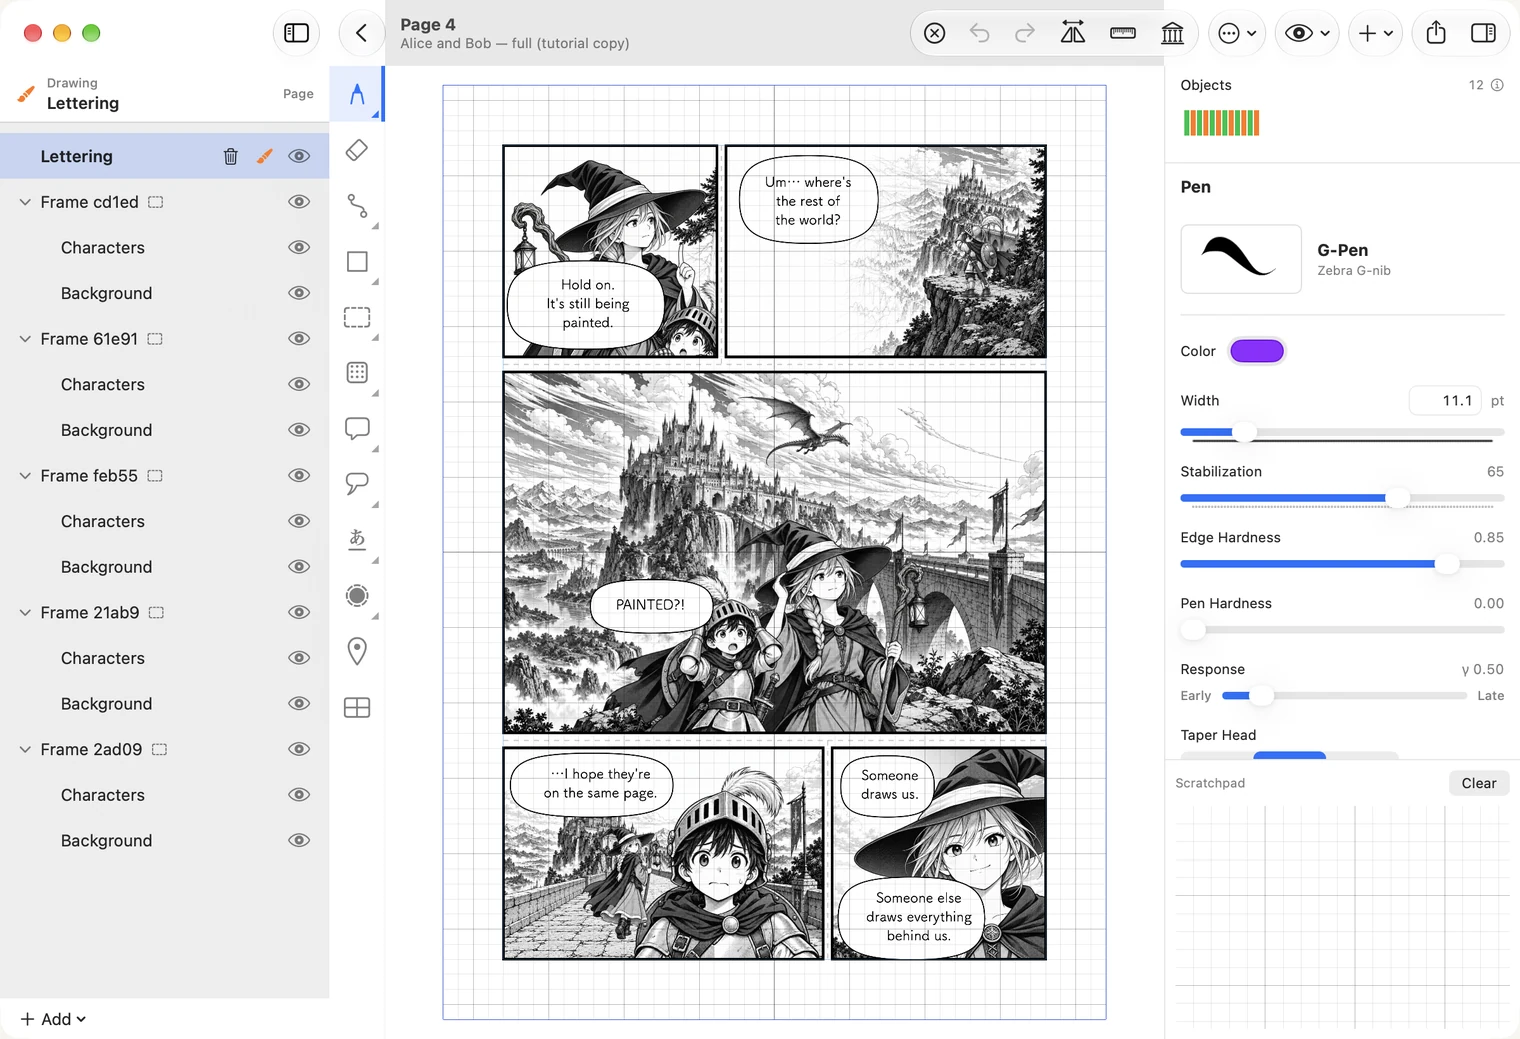
Choose the frame tool, the last one in the strip. On a page with no panels yet, press Create Frame Layout. The page gets one panel.
Cut a panel
Drag across a panel, from outside one edge to outside the opposite edge.
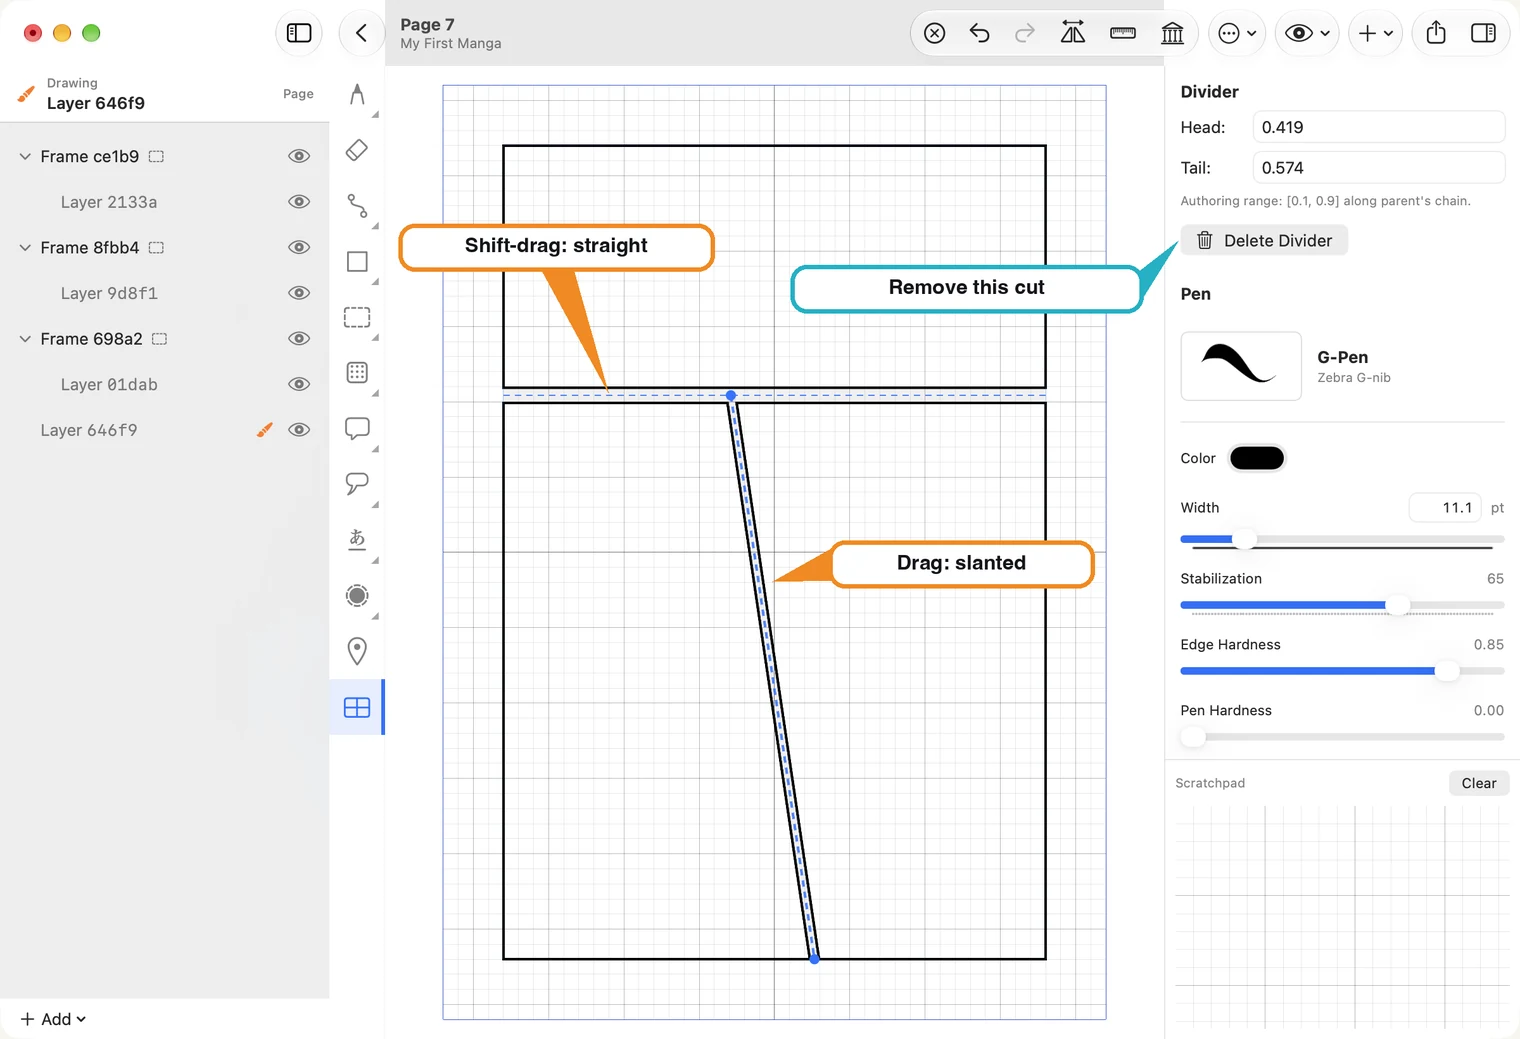
- On Mac, hold Shift for a cut that is perfectly level or upright. Without Shift the cut follows your drag, so it can slant.
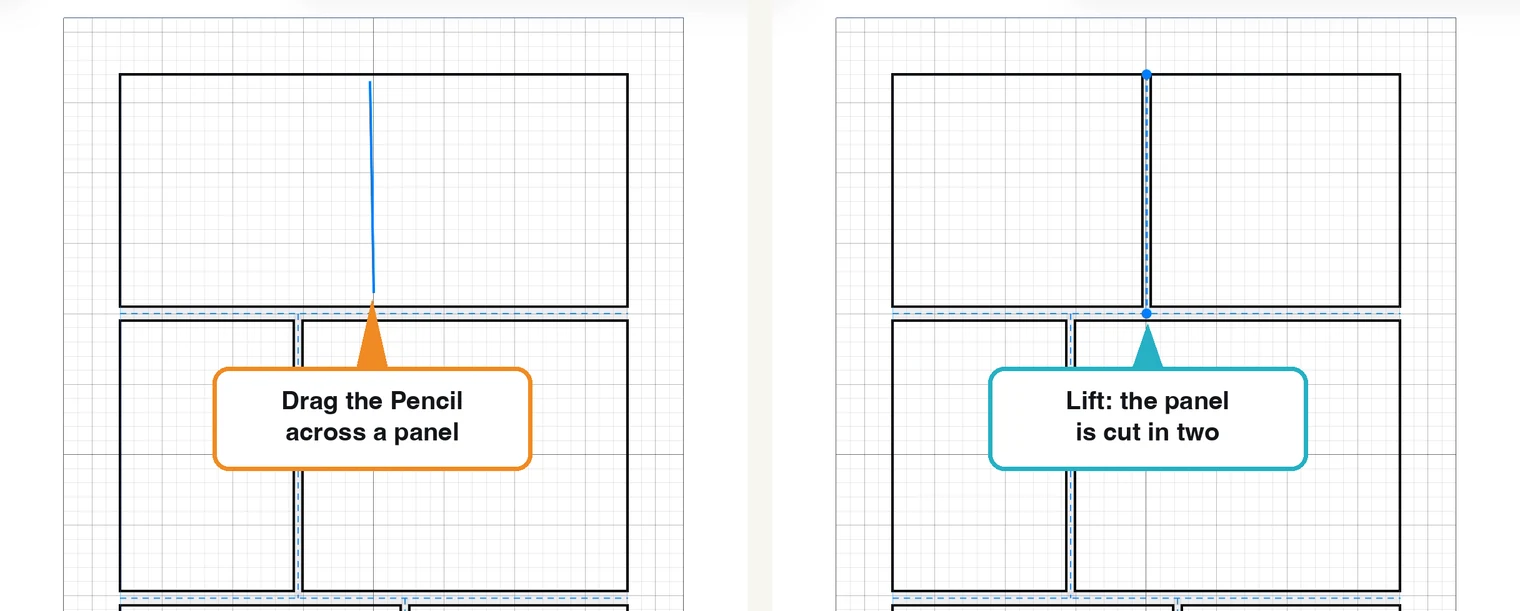
- On iPad, drag the Pencil across the panel. A blue line follows it, and the panel is cut when you lift. A drag that is nearly straight snaps straight; a clearly angled drag makes a slant.
- A cut only divides the panel you drag across. Cut again inside any panel to divide it further.
Each new panel appears in the layer list as a Frame with a layer inside, ready to draw in.
Move a cut
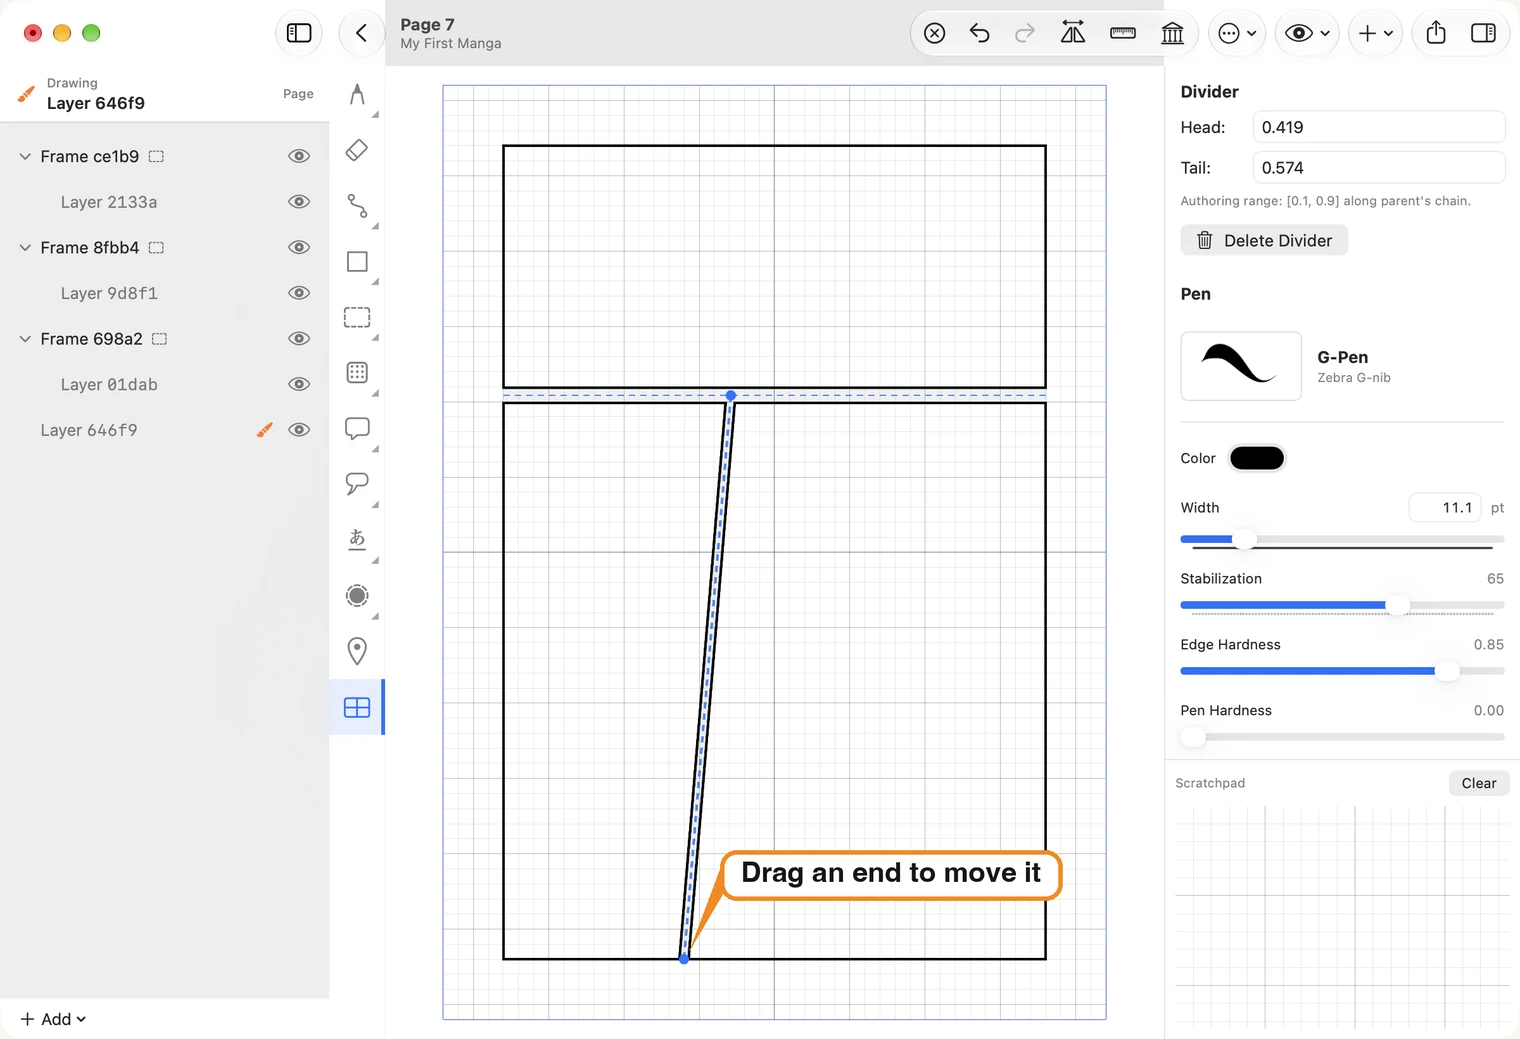
The app calls a cut a divider. With the frame tool, click a cut to select it. A dot appears at each end. Drag a dot along the edge to move that end; move both to shift the whole cut.
Remove a cut
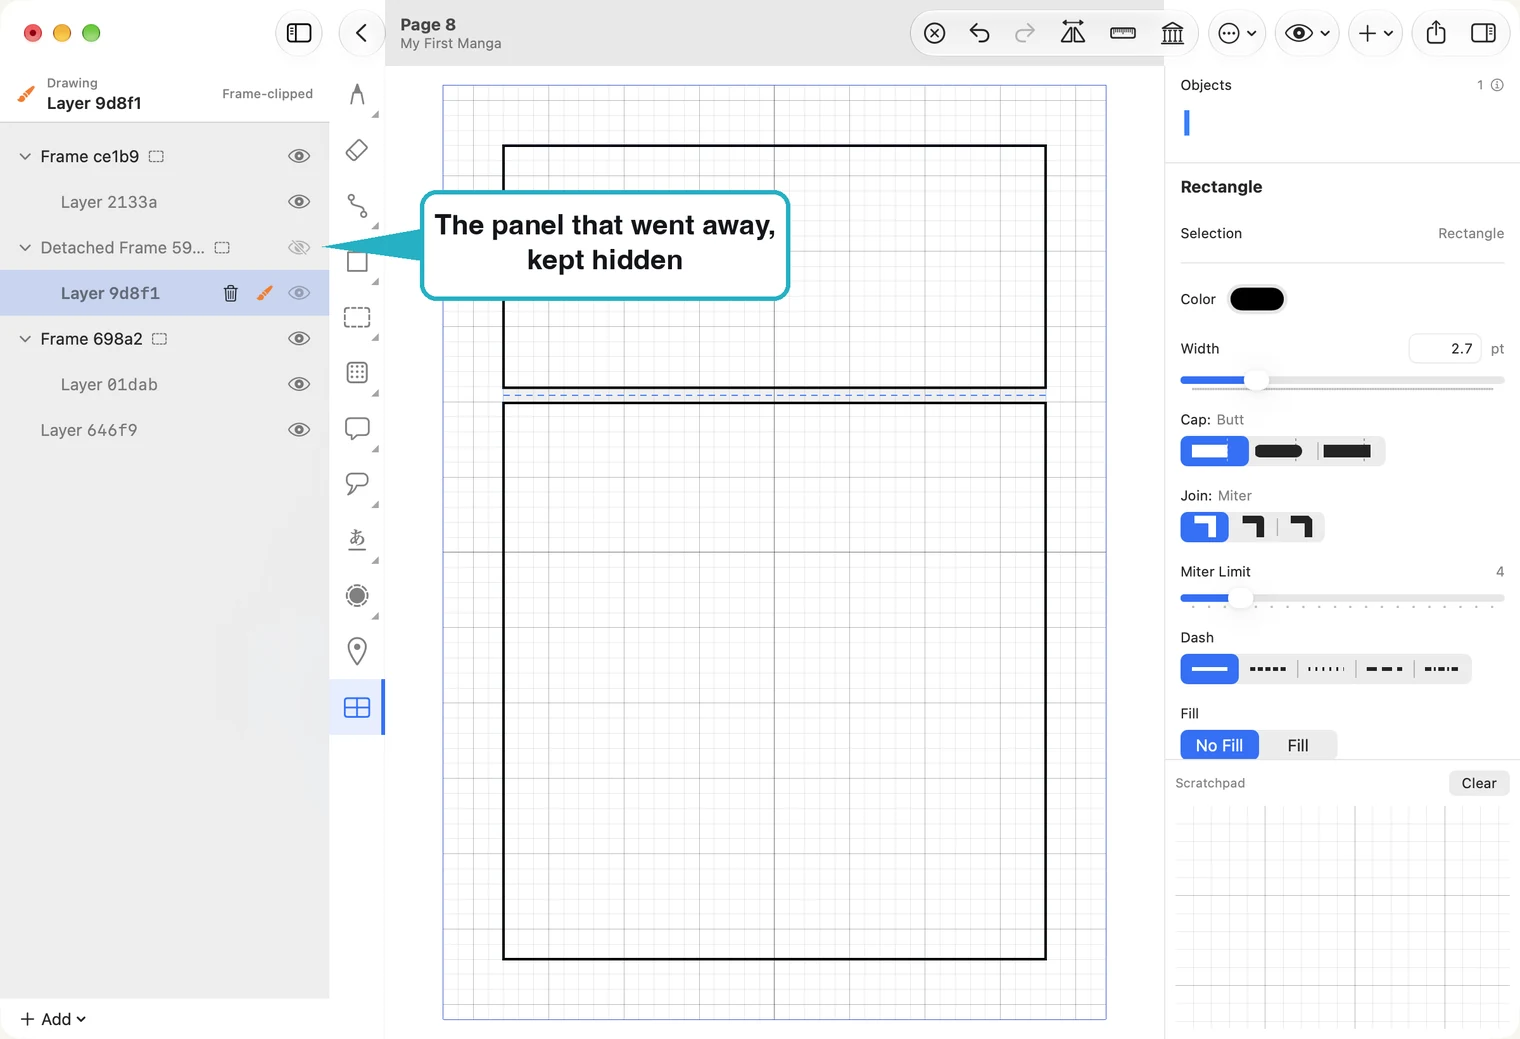
Select the cut and press Delete Divider on the right. The two panels become one again. What was drawn in the panel that went away is not thrown out: its frame stays in the layer list, hidden, marked Detached Frame. ⌘Z puts the cut back.
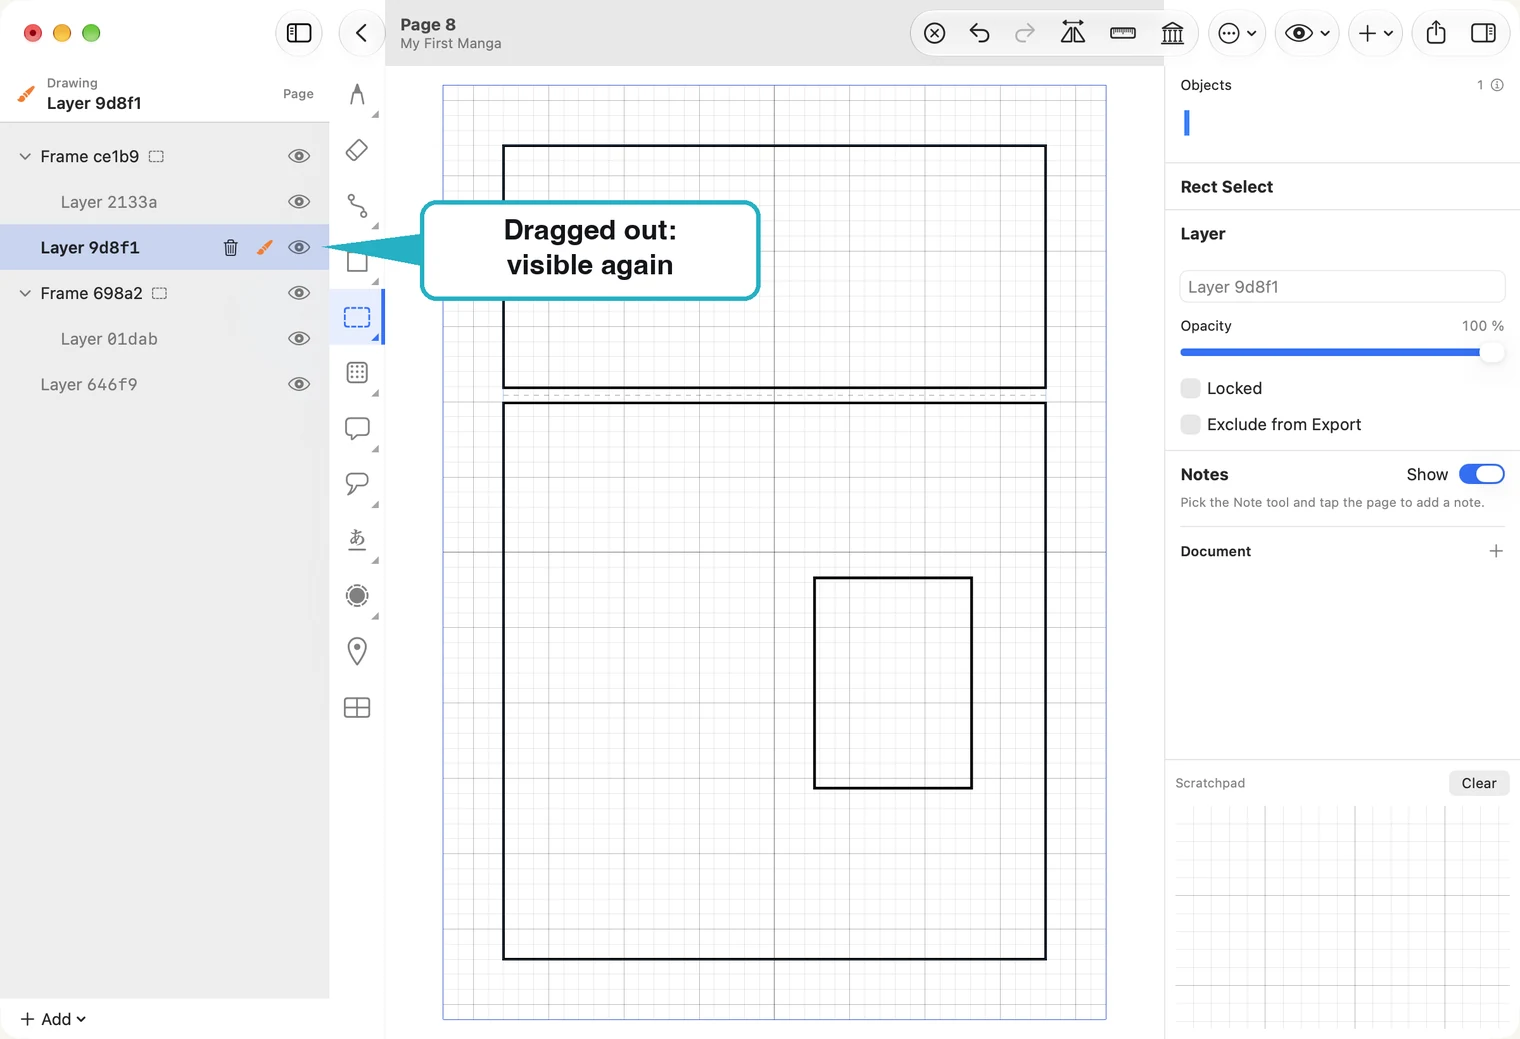
To use that drawing again, drag its layer out of the Detached Frame and drop it between two frames. It becomes a layer for the whole page, and is visible again as soon as it lands.
If you do not need the drawing, right-click the Detached Frame and choose Delete….
Draw inside a panel
Choose the selection tool and click inside the panel. It is lit, the rest of the page goes grey, and what you draw is cut off at the panel's border. More in Layers.
Border width
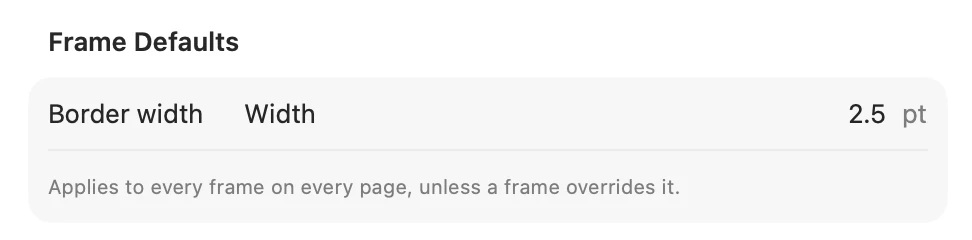
The border line is one setting for the whole document: open Document Settings (the gear button in the page list) and change Border width under Frame Defaults. It applies to every panel on every page.
A panel that is not a rectangle
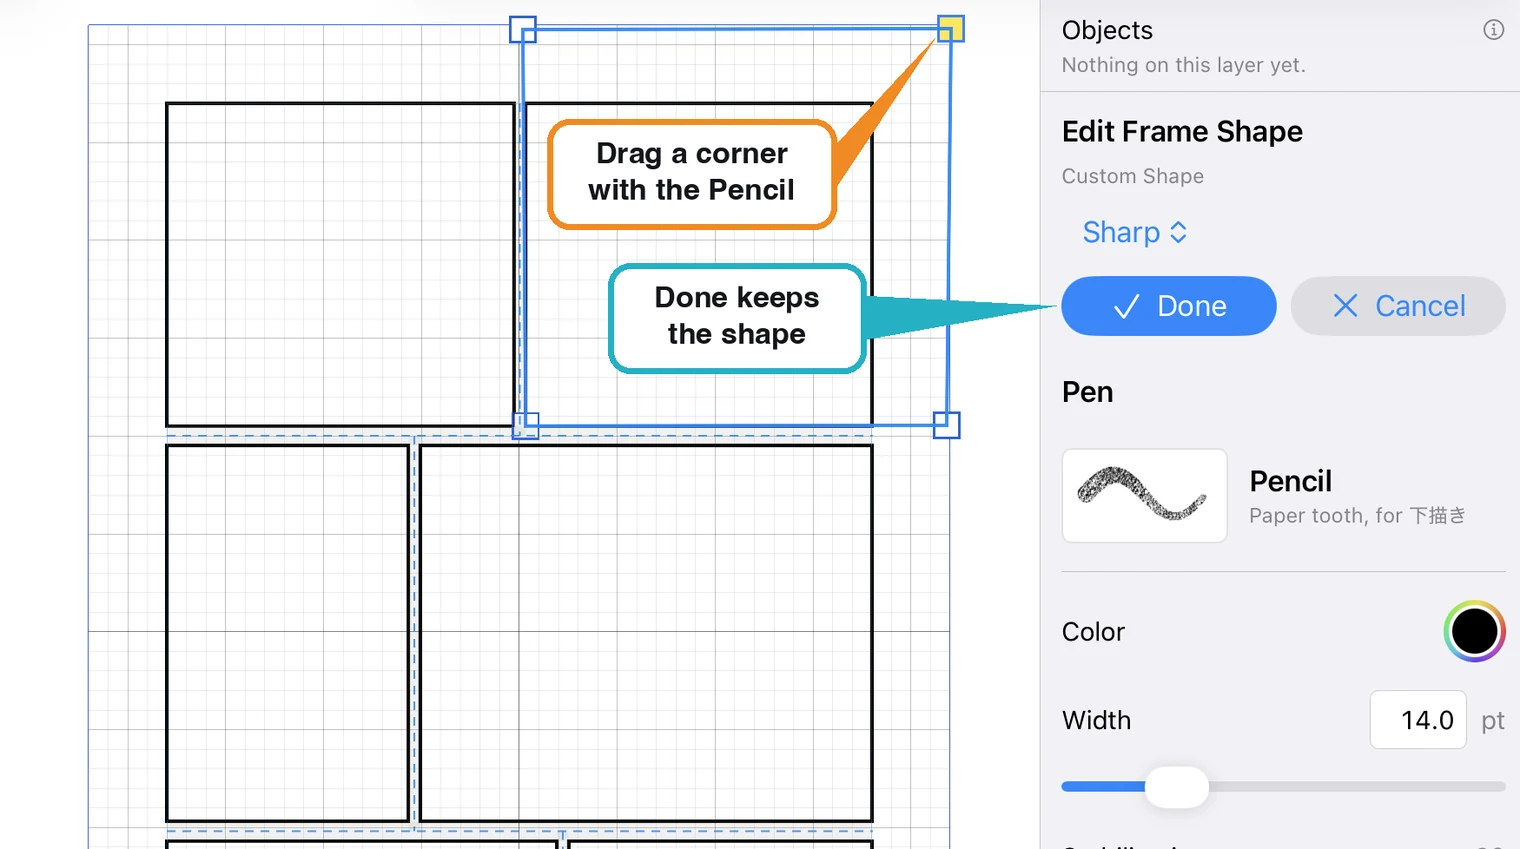
Select the panel: click an empty part of it with the selection tool, or click it with the frame tool. On the right, press Edit Shape. The panel shows a square at each corner; drag one and the border follows.
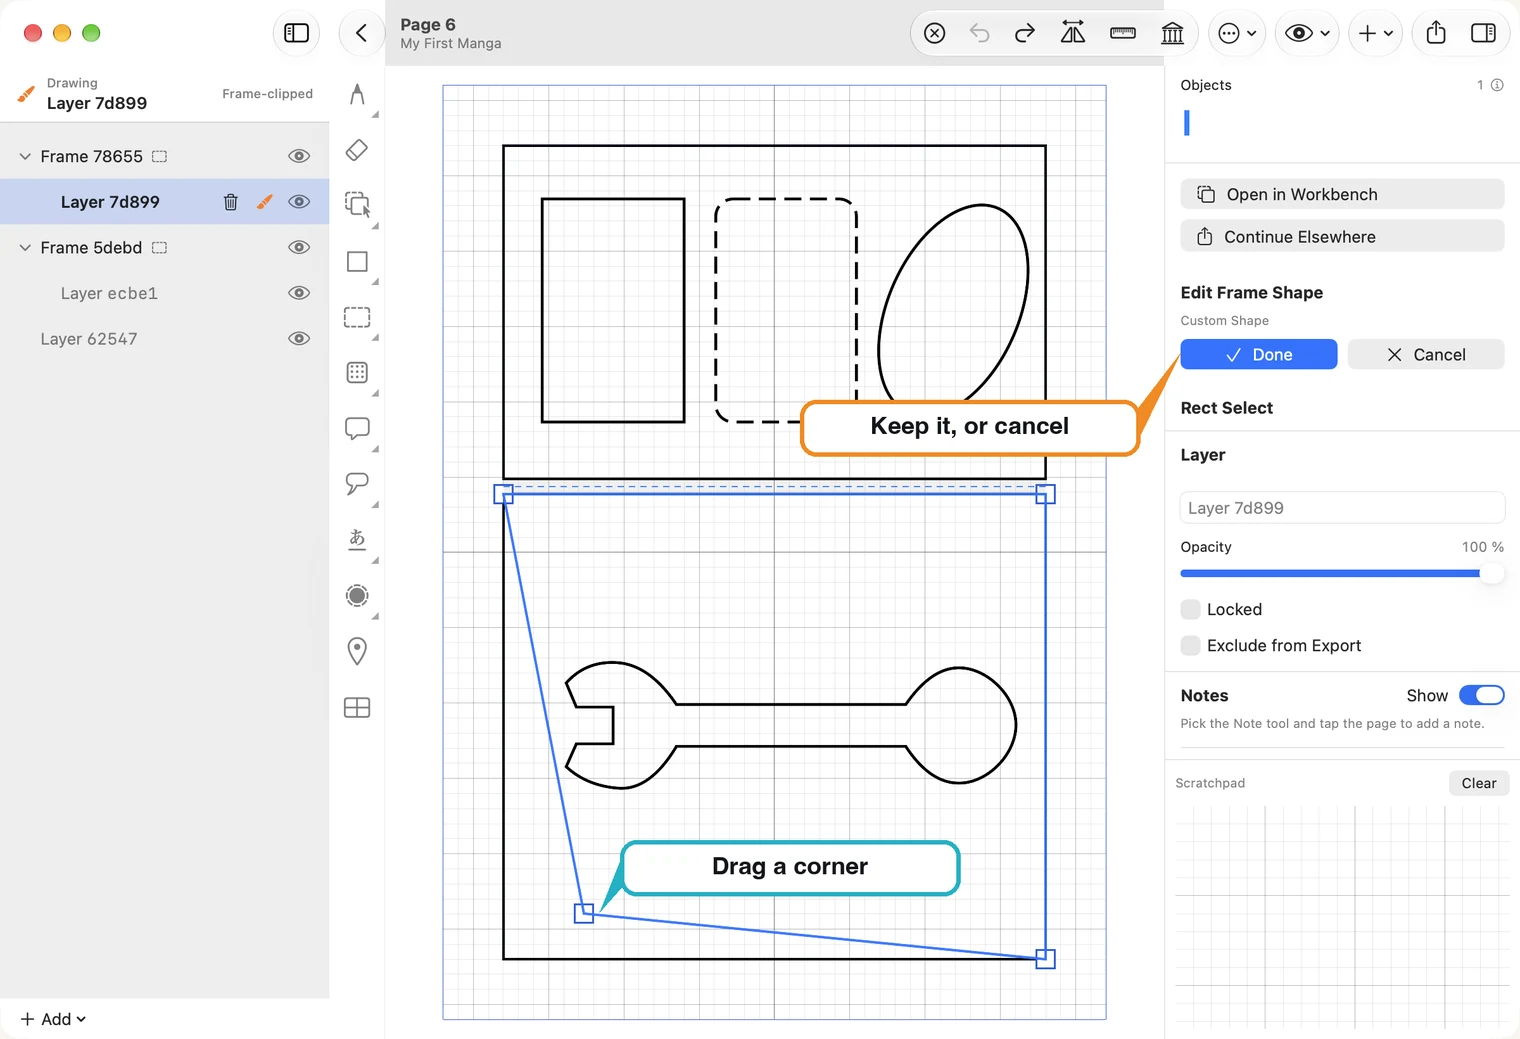
Done keeps the new shape; Cancel puts the panel back as it was. What is drawn in the panel is cut off at its new border.
For art that should cross a border, such as a hand reaching out of a panel or a balloon over two panels, draw it on a layer that is outside the frames: + Add ▸ Add Page Layer — outside frames, under the layer list. A layer there covers the whole page and is not cut off by any panel. More in Layers.
On iPad, tap the panel with the frame tool, tap Edit Shape and drag a corner with the Pencil. A panel whose shape you changed also shows Reset Shape, which makes it a plain rectangle again.