Brush and eraser
Brushes, eraser, undo, zoom and pan, mirror canvas.
Drawing input: pen, finger, mouse
The brush and the eraser draw with a pen only. That is on purpose: a resting finger or a stray click can never leave a mark on your page.
- On iPad, Apple Pencil draws. A finger moves and zooms the page.
- On Mac, a pen tablet draws. Dragging with a mouse or trackpad moves the page instead.
- Everything else works with a mouse or trackpad: paths, shapes, balloons and tails, text, tones, selecting and moving. With no pen tablet you can still make a whole page; see Paths and shapes.
- Menus on the page open with the mouse or a finger, not the pen: right-click on Mac, touch and hold on iPad. On the page the pen is kept for drawing. The tools in the strip are different: there the Pencil works like a finger.
Brushes
The brush tool is at the top of the strip. MangaLoft comes with nine brushes, named after the pens a manga artist keeps on the desk. To choose one, press and hold the brush tool: a list opens with a sample stroke beside each name. On Mac, ⌘1 to ⌘8 choose the first eight from the keyboard, and the Brush menu lists them. The ninth, Dry Charcoal, is chosen from the list.
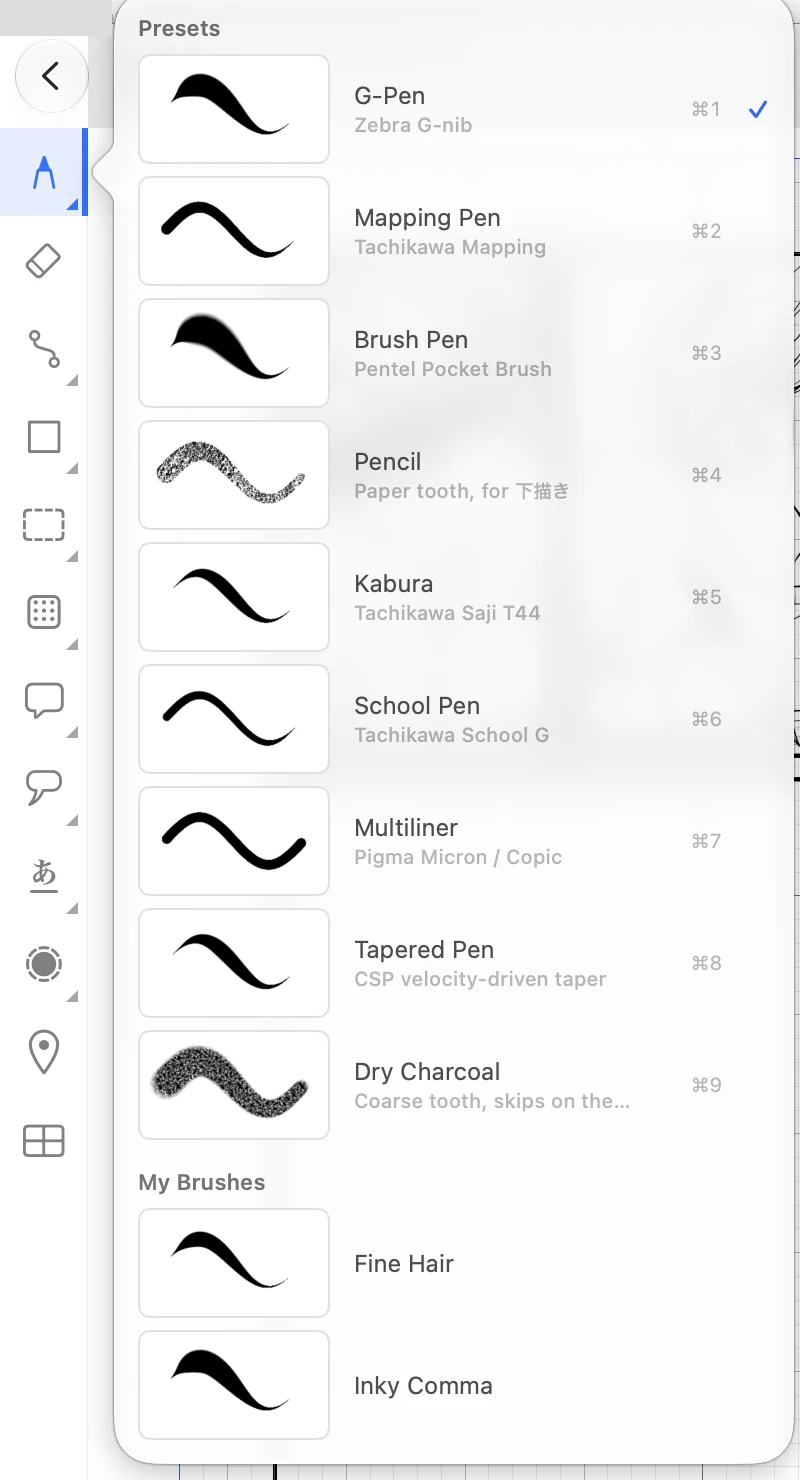
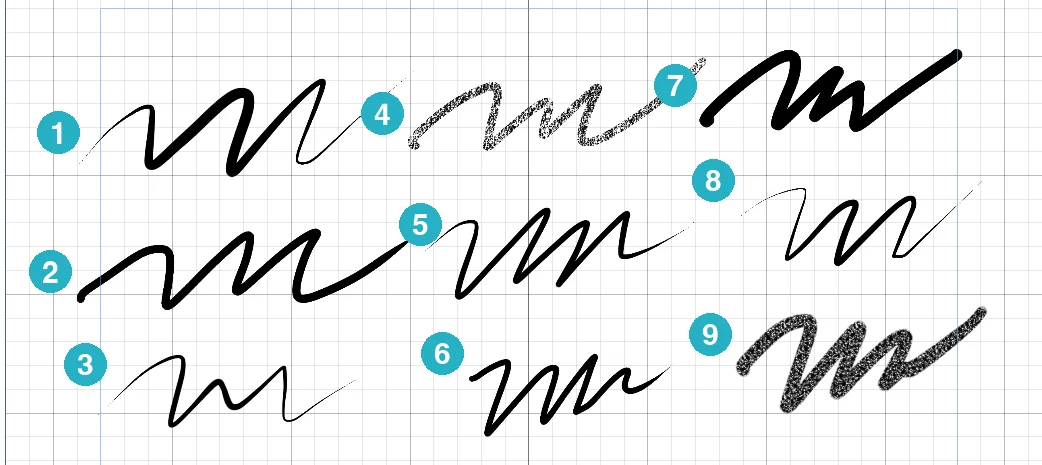
- G-Pen — the all-round manga nib; the line swells as you press.
- Mapping Pen — a springy nib; bold when you press.
- Brush Pen — a soft tip; light and fine.
- Pencil — grainy, for the rough sketch under the ink.
- Kabura — a spoon nib; an even, steady line.
- School Pen — a stiff nib; thin and regular.
- Multiliner — a fibre-tip pen; the same width however you press.
- Tapered Pen — uses long tapers at both the start and the end of the stroke.
- Dry Charcoal — coarse, and skips on the page.
Brush settings
The right side shows the chosen brush and its settings. Below them is the Scratchpad, a small sheet for trying a brush without touching your page. Draw a few strokes there, then move a setting: the strokes are drawn again with the new value, so you see what each setting does to your own hand. Clear empties it.
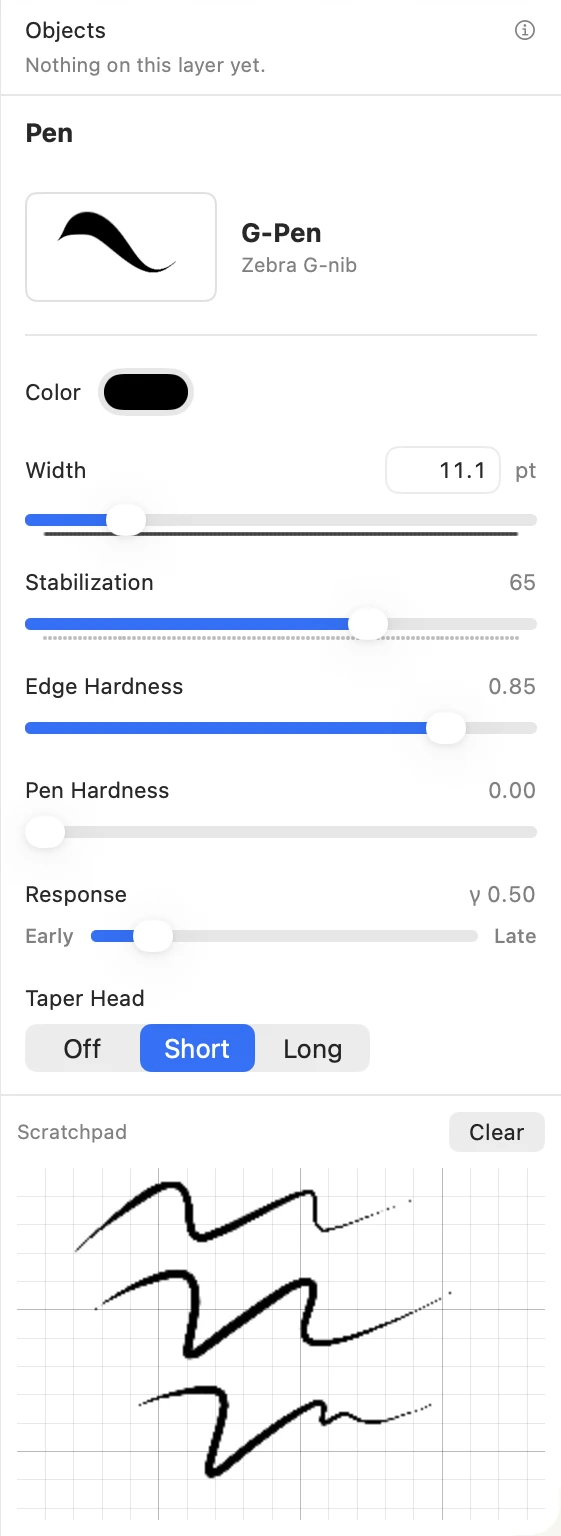
- Color and Width — the ink, and how wide the line is at full pressure.
- Stabilization — higher steadies a shaky line.
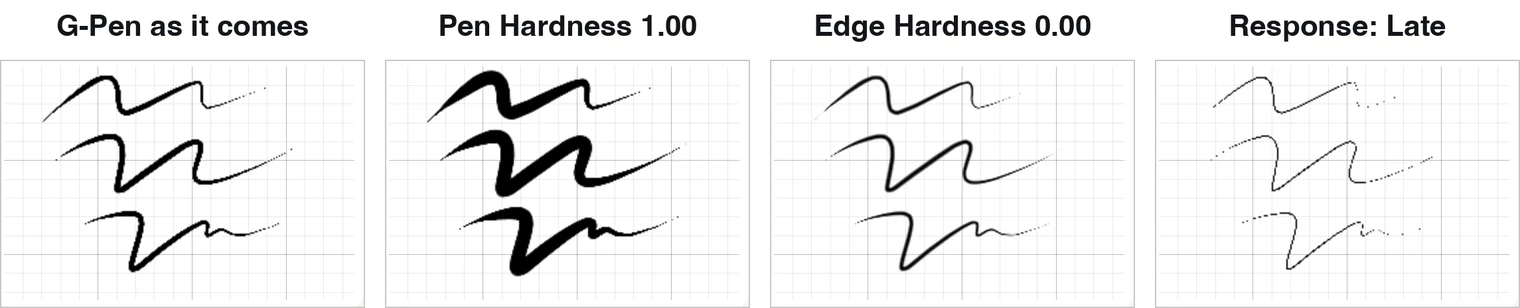
- Edge Hardness — high gives a crisp edge like a nib; low gives a soft, lighter edge like a pencil.
- Pen Hardness — how much the nib gives. At 0 the line swells and thins with your pressure; at 1 it stays one width however you press.
- Response — how soon the line thickens. Early swells at a light touch; Late stays thin until you press hard.
- Taper Head and Taper Tail — how the stroke thins at its start and its end: Off, Short or Long.
Your own brushes
When you have set a brush the way you like it, keep it. At the bottom of the brush settings, press Save Current Brush and give it a name. It joins My Brushes, at the bottom of the brush list, and you choose it like any other.
To tidy them, open the Library: the button like a small building in the toolbar, or Manage Brushes… in the Brush menu. The … beside each brush offers Rename…, Duplicate and Move to Trash. A brush in the Trash can be restored from the same window for 30 days.
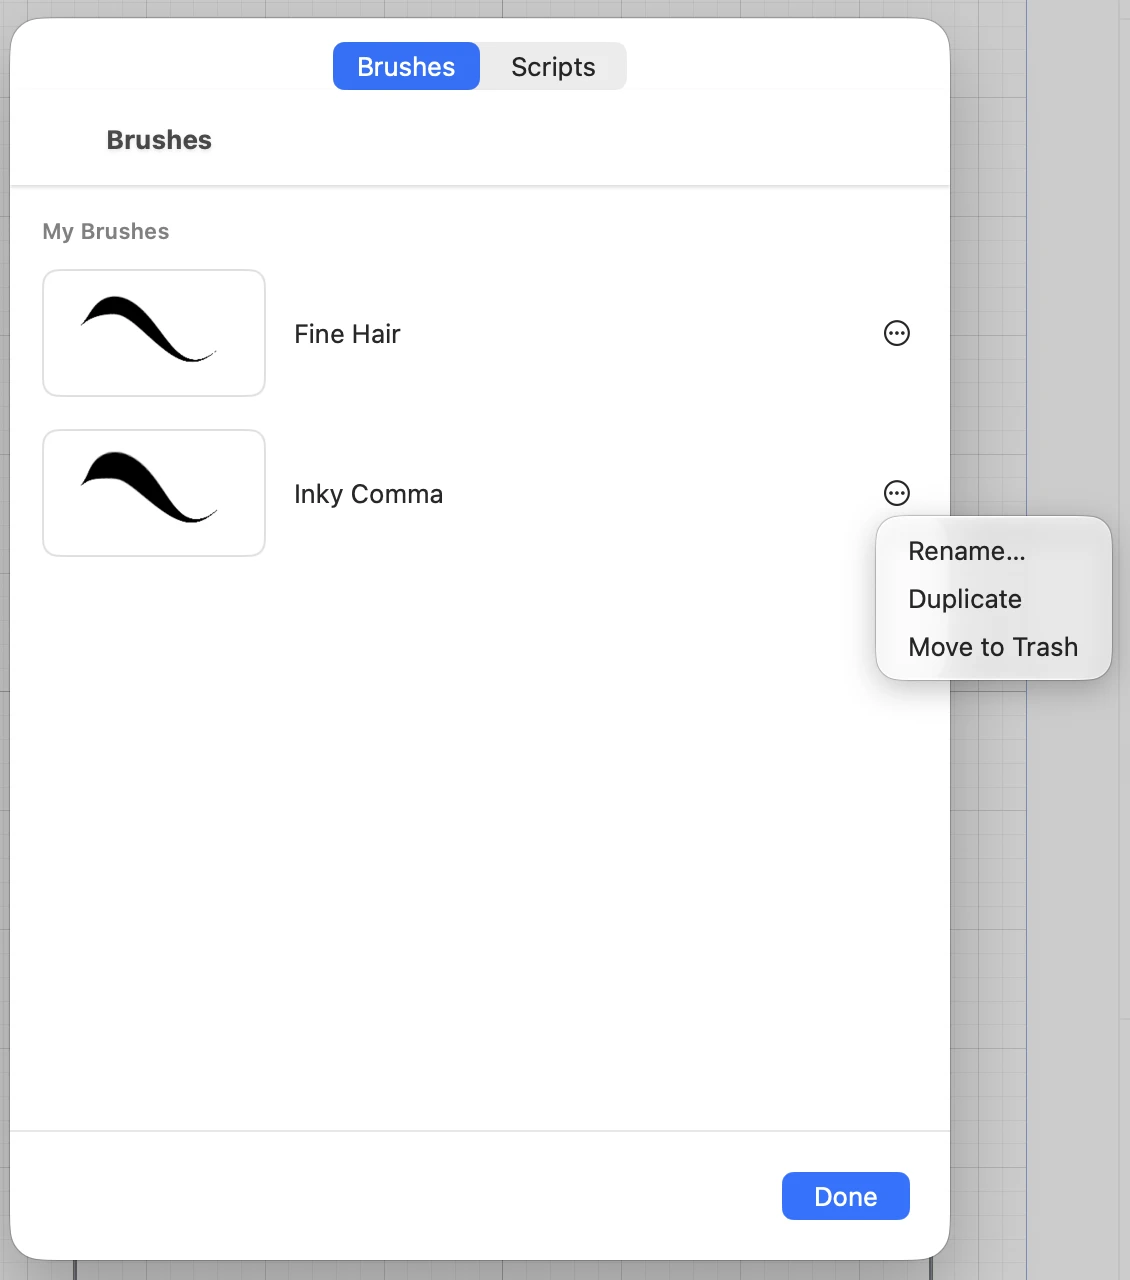
The nine brushes that come with MangaLoft cannot be renamed or removed. Changing a setting on one of them changes only your next strokes; choose the brush again to get it back as it came.
Your brushes follow you. With iCloud signed in, the brushes you save appear on your other Mac and iPad under the same Apple Account. It can take a little while, and it does nothing when you are signed out.
On iPad, touch and hold the brush tool, with a finger or the Pencil, to open the brush list; a plain tap only picks the pen. The Library button in the toolbar opens the same window as on the Mac. Its second tab, Scripts, holds the scripts you saved for Script Tones and line decorations.
Eraser
The eraser is below the brush tool. It is a brush that takes away instead of adding: it has the same feel under the pen, and its one setting is Width. Like a pen, its line gets thicker as you press harder.
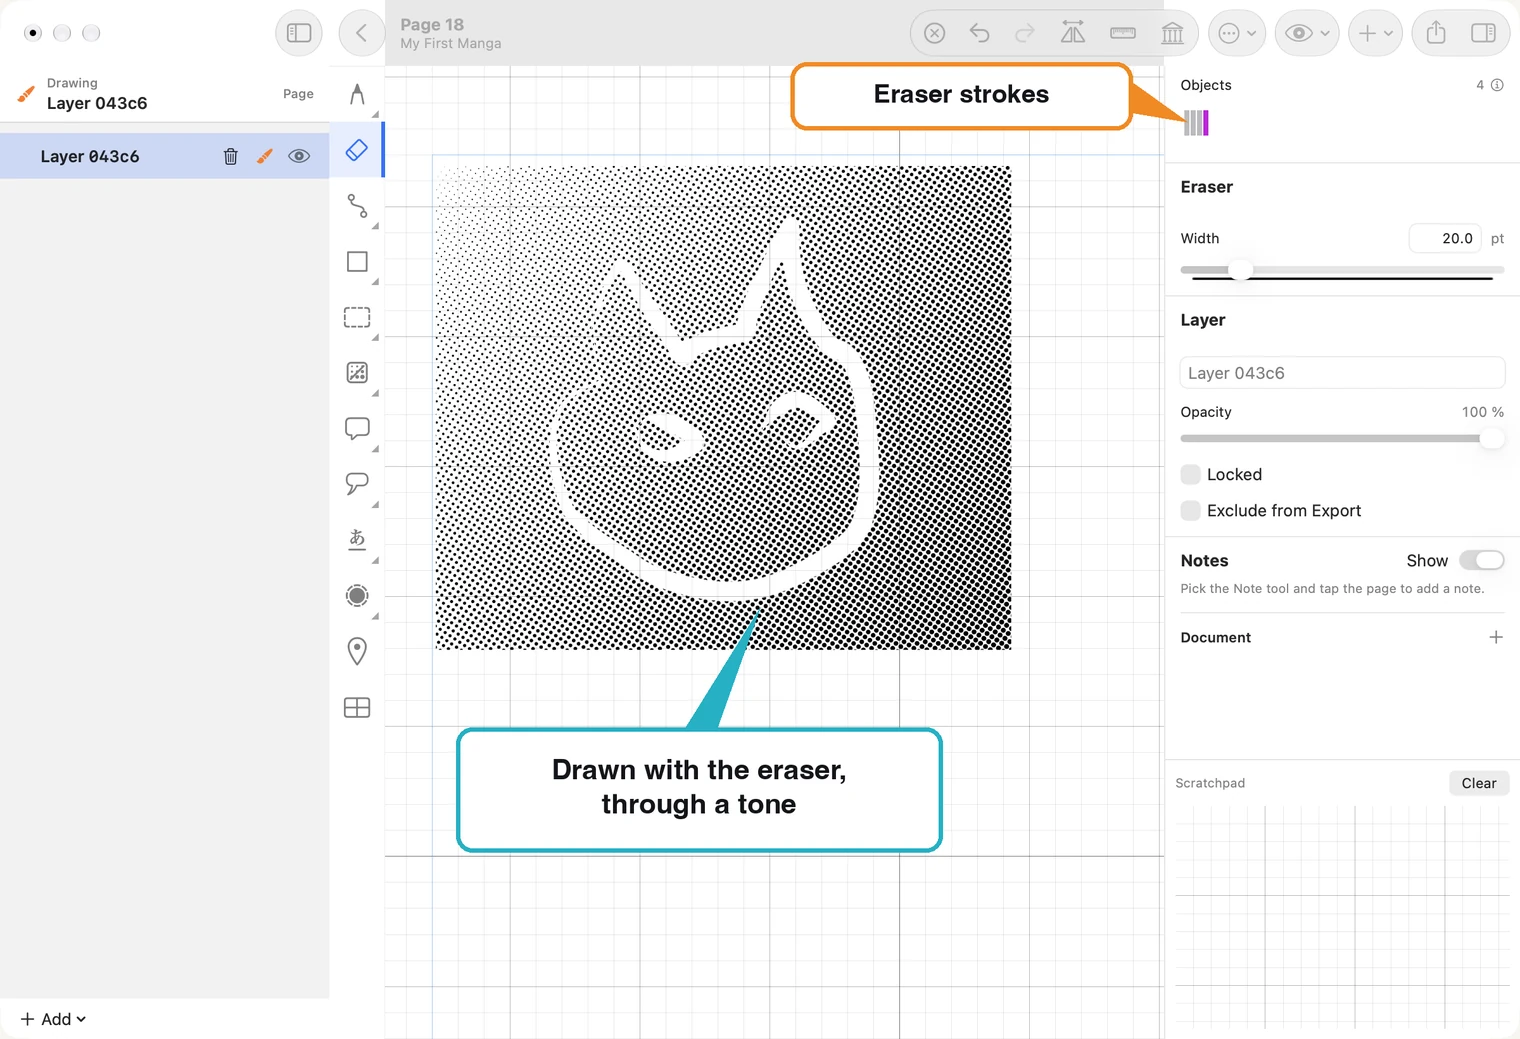
- It erases everything on the layer you are on: brush strokes, paths, shapes and tones alike. Other layers are not touched, so keep what you want safe on its own layer.
- It is for drawing, too. A white line through a tone, a highlight in hair, a spark in an eye: draw them with the eraser.
- Nothing is destroyed. Each eraser stroke is kept on the layer like any other stroke. Undo takes it back, and what was under it returns.
Change the ink of strokes you have drawn
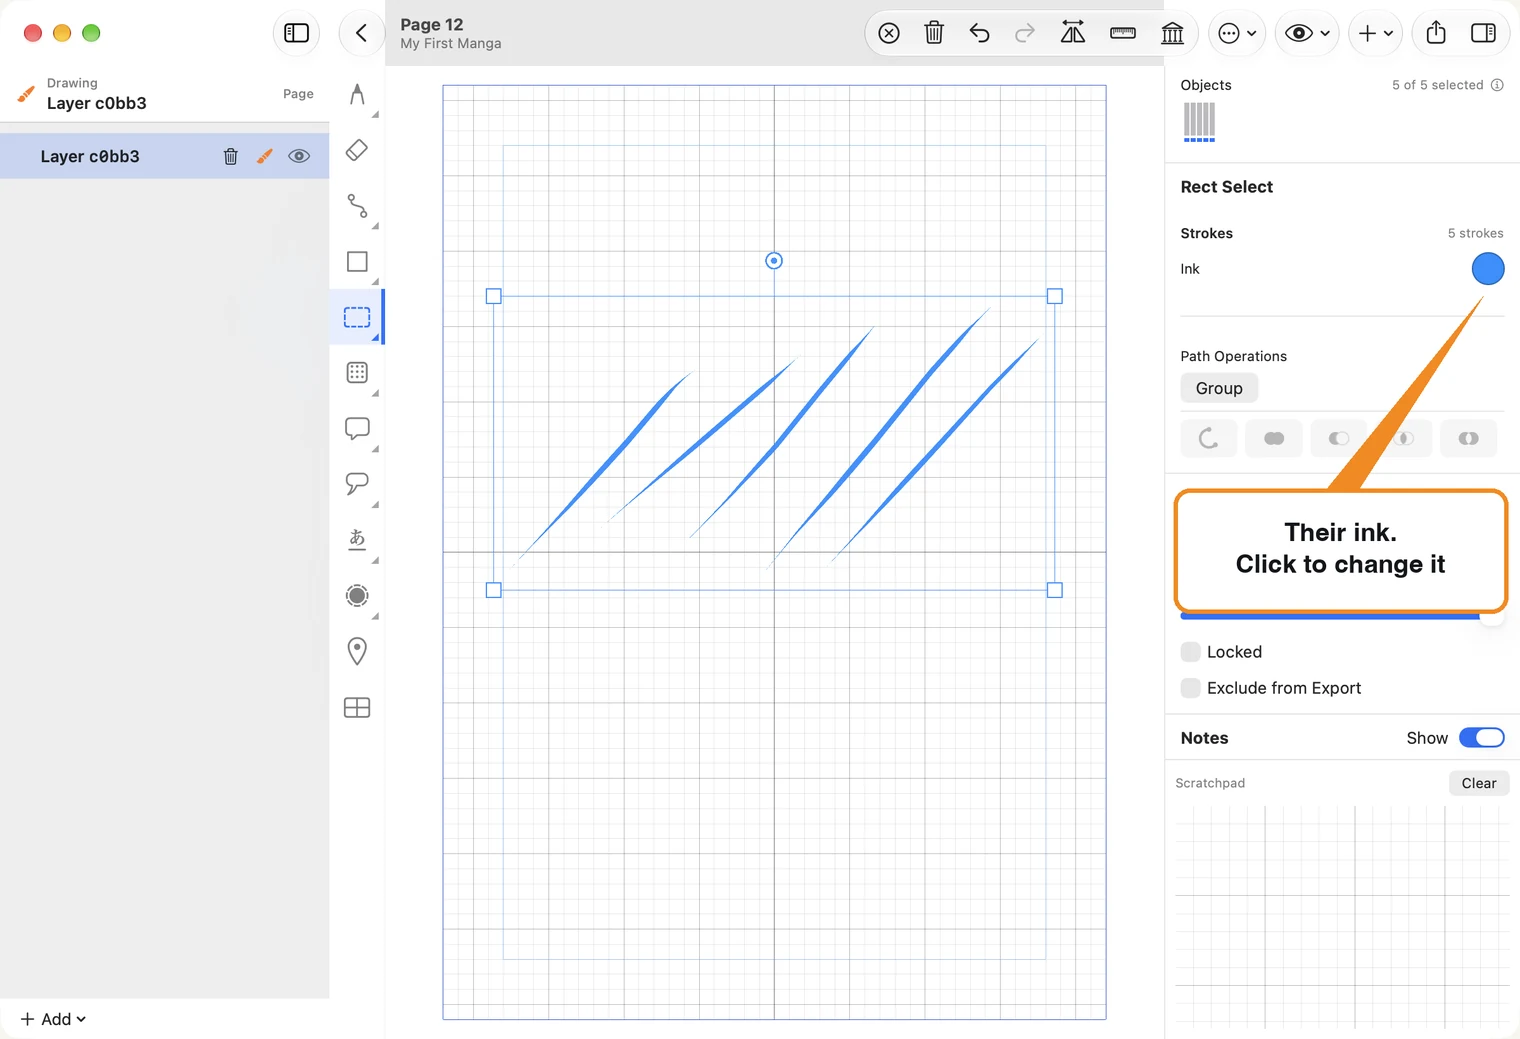
A stroke is not stuck with the ink it was drawn in. With the selection tool, select the strokes you want to change, one or many, and nothing else. On the right, Strokes appears with an Ink well showing their colour.
- Click the well and pick a colour. Every selected stroke takes it as you pick.
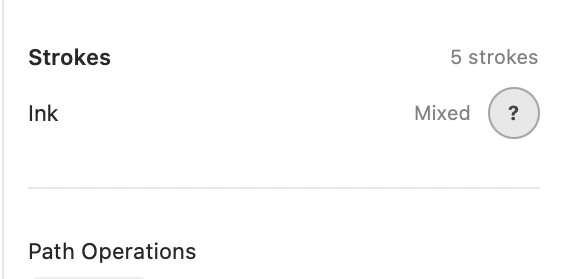
- A well with a question mark, and the word Mixed, means the selected strokes are not all one ink. Pick a colour and they become the same.
- One undo takes it all back, however long you tried colours.
- Selected strokes are tinted blue while they are selected. Deselect (⌘D) to see the new ink.
Eraser strokes are left as they are. Strokes inside a group are not reached: ungroup them first.
Undo and redo
Undo takes back the last thing you did: a stroke, an eraser stroke, a move, a change of a setting. Redo puts it back. They are the two curved arrows in the toolbar, on Mac and on iPad. On Mac, ⌘Z is Undo and ⌘⇧Z is Redo.
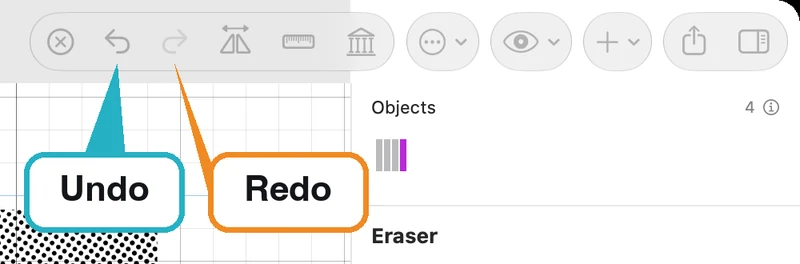
- Press it again to go further back, one step each time.
- Redo is grey until you undo something. Once you draw something new, the steps you undid are gone.
- Undo belongs to the page while it is open. Go back to the page list and the page is saved as it is; when you open it again, both arrows are grey.
Zoom and pan
You draw a page at two distances: close in for an eye or a strand of hair, far out to see how the panels read together. Zooming changes only how near you are; the drawing stays the same size on paper.
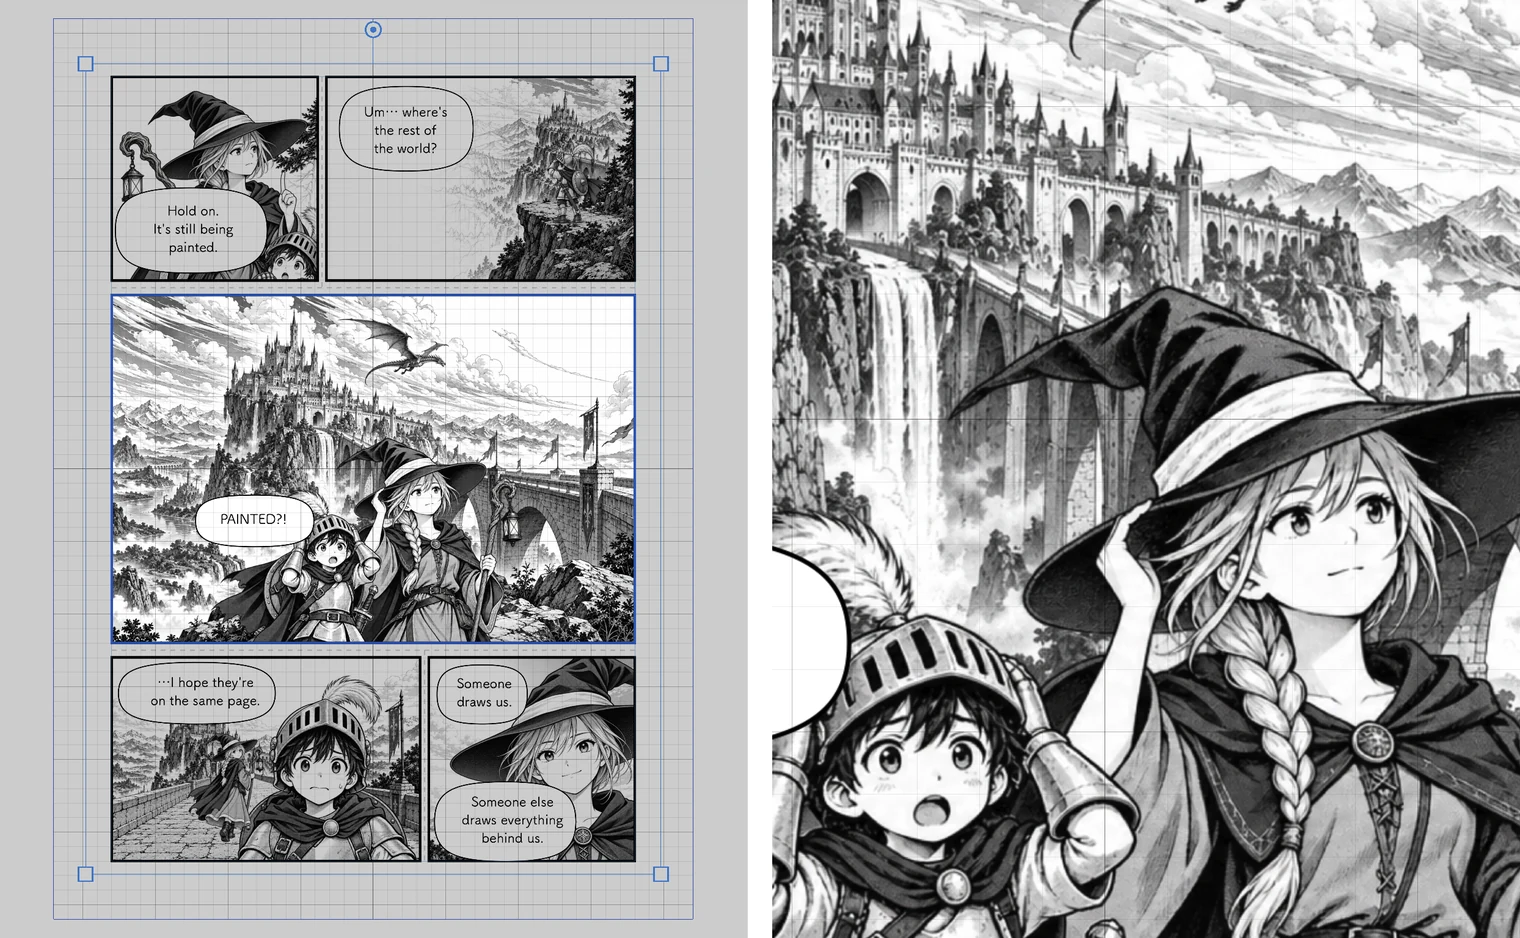
- On a Mac trackpad, pinch to zoom, and slide two fingers to move the page.
- On iPad, pinch to zoom, and drag with two fingers to move the page.
- To see the whole page again, open the eye menu in the toolbar and choose Zoom to Fit (⌘0 on Mac). Zoom to Fit Width and Zoom to Fit Height fill the window one way only.
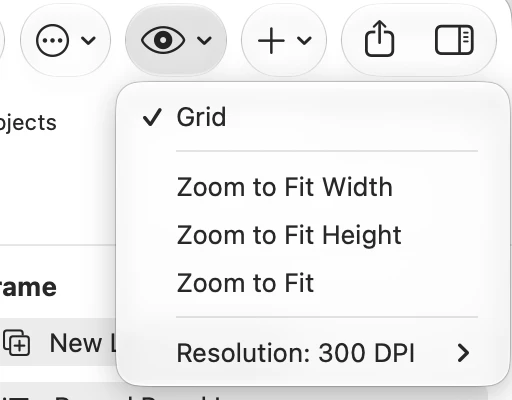
You can zoom in as far as sixteen times.
On iPad the eye menu is in the same place, with the same three Zoom to Fit items.
With a mouse and no trackpad, the wheel moves the page up and down, and Shift with the wheel moves it across. To zoom, use the three Zoom to Fit items in the eye menu or the View menu; ⌘0 fits the whole page. Zooming freely to any size needs a trackpad or a Magic Mouse.
Mirror canvas
A drawing you have looked at for an hour hides its own mistakes: an eye set too high, a face that leans. Flip it left to right and they show at once. Mirror, the two triangles in the toolbar, flips the whole page; press it again to flip back.
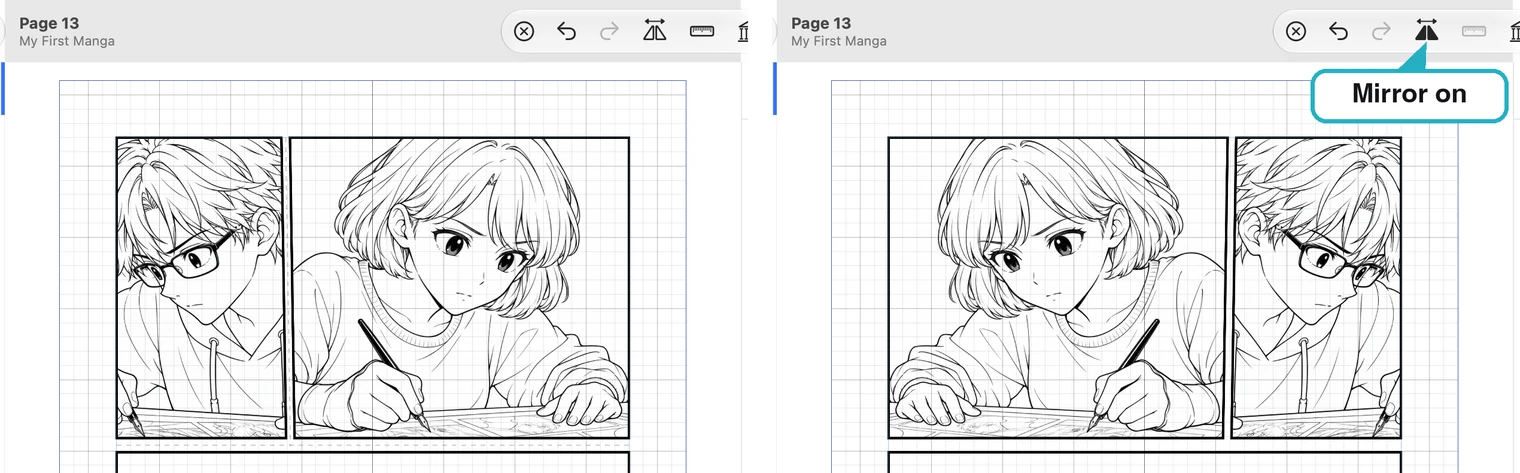
- You can keep drawing while it is flipped. The brush and the eraser both work, and your strokes land where you see them.
- Mirror works only with the brush and the eraser. Choose any other tool and the page flips back. The ruler is put away while the page is mirrored.
- It changes the view, not the drawing. Nothing is saved flipped, and an exported page is always the right way round.